
Your power drill battery dies mid-project. You’re camping with no tools. Or you simply need a tiny pilot hole for a craft. Whatever the scenario, knowing how to make a hole without a drill is a critical skill that turns frustration into triumph. Humans have created precise holes for millennia using nothing but ingenuity and basic tools—long before electricity existed. This isn’t just about survival; it’s about resourcefulness in everyday DIY, woodworking, and crafting. Whether you’re working with stubborn hardwood, delicate tile, or even leather, these time-tested techniques deliver clean holes when power tools fail you.
Forgetting your drill doesn’t mean abandoning your project. Manual hole-making methods offer surprising precision and control, often outperforming power tools for delicate tasks. In this guide, you’ll discover exactly which hand tools to grab first, how to improvise with household items, and material-specific tricks that prevent cracks, melting, or wandering bits. Most importantly, you’ll learn why brute force fails—and how gentle, consistent pressure creates perfect holes every time. Let’s turn your limitation into an advantage.
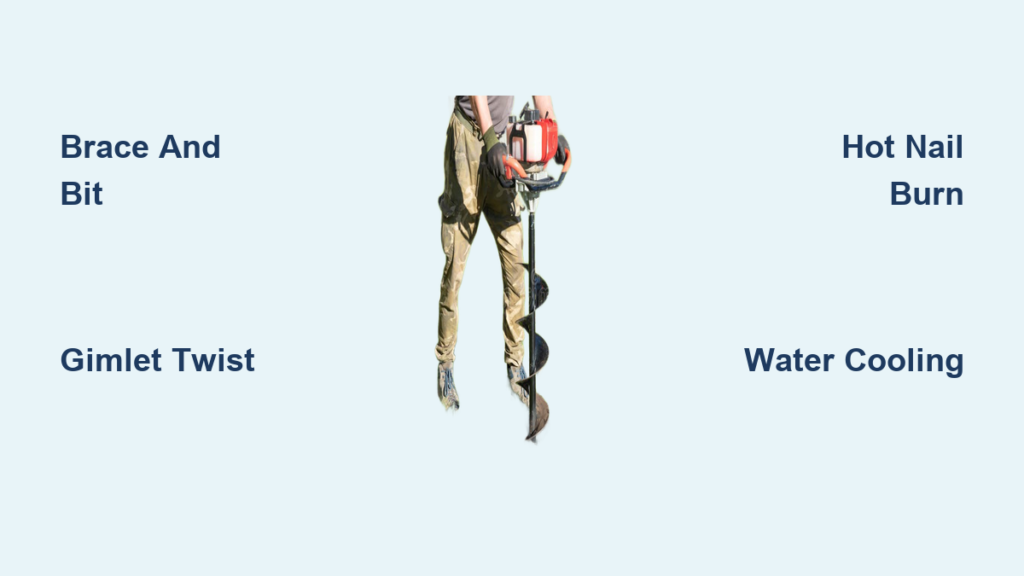
Brace and Bit: Drill Large Wood Holes Without Power
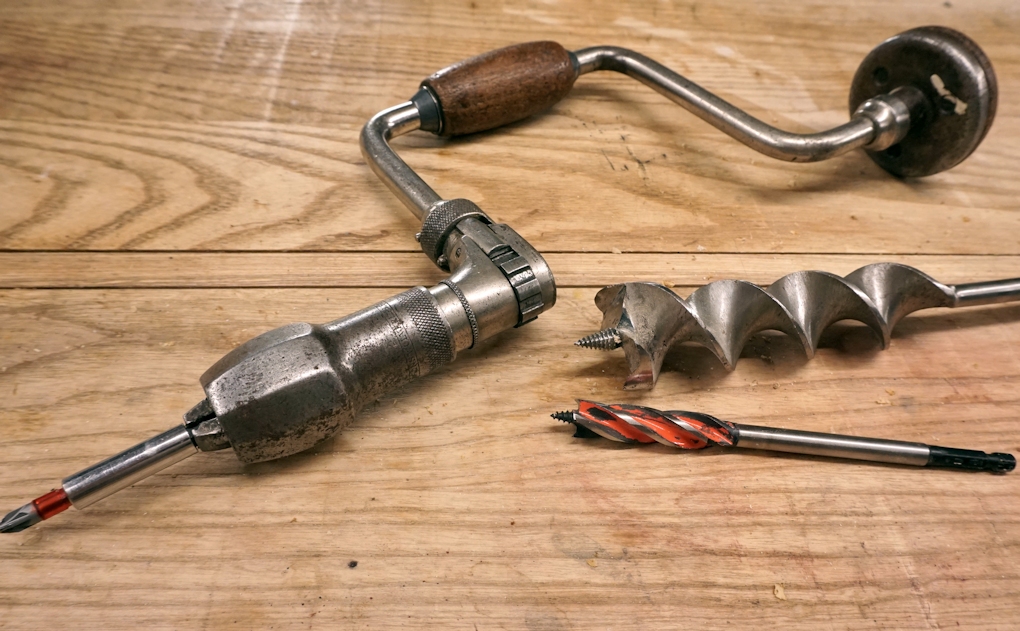
This isn’t your grandfather’s tool—it’s the undisputed champion for drilling deep, clean holes in wood when electricity fails. The brace and bit converts hand-crank motion into immense torque, effortlessly boring 1/2-inch holes through oak or pine. Start by securing your workpiece in a vise. Position the screw tip precisely on your mark, then apply firm downward pressure as you turn the crank handle steadily. Critical technique: Let the bit’s sharp cutting edges do the work—never force it. If the bit binds, back it out to clear wood shavings. For holes over 1 inch, drill from both sides to prevent exit splintering.
Why This Beats Power Drills for Wood
Power drills often spin too fast for manual control, causing tear-out or overheating bits. The brace’s slow rotation (under 200 RPM) gives you tactile feedback, so you feel when to adjust pressure. Use a Forstner bit for flat-bottomed holes in cabinetry or an auger bit for deep through-holes. Pro tip: Rub candle wax on the bit shaft to reduce friction and heat buildup during extended drilling.
Gimlets and Pin Vises for Tiny Precision Holes
When you need a pilot hole for a #4 screw or a model-making detail, these pocket-sized tools outperform any drill. A Japanese gimlet (kiri) slices clean holes in softwood with a simple twist of its knife-like blade. For harder materials like acrylic or thin metal, clamp your workpiece, then press a pin vise bit vertically onto your mark. Roll the vise between your palms using smooth, even rotations—no downward hammering.
Avoid This Common Mistake
Forcing the bit sideways to “start” the hole guarantees wandering. Instead, create a starter dimple with an awl or nail first. For plastics, drill at half-speed and insert a scrap wood backing board to prevent exit chipping. If your pin vise bit binds, back it out and clear debris—never twist harder, as this snaps delicate bits.
Punch Metal Holes Without a Center Punch
Metal’s hardness makes hole-making terrifying without power tools, but this method prevents “bit walking” every time. Heat a nail tip in a flame until red-hot, then quench it in water to harden. Place the nail point on your mark and strike it once with a hammer to create a divot. This anchors your pin vise bit perfectly. Now, secure the metal in a vise, apply cutting fluid (or light oil), and drill with slow, consistent pressure using a cobalt-coated bit.
Why Heat-Hardening Matters
A regular nail bends on impact, creating an uneven starter hole. Heating and quenching transforms it into a makeshift center punch. For thin sheet metal, sandwich it between wood scraps to prevent buckling. Never rush—metal drilling requires patience; 10 slow turns beat 50 frantic ones that overheat and ruin the bit.
Prevent Plastic Melting: Hand Drill Techniques

Plastic melts under friction heat faster than you can say “ruined project.” Combat this by switching to a brad-point bit in your pin vise—it scores a clean circle before boring. Drill at a snail’s pace (under 100 RPM) while clamping a sacrificial wood block behind the plastic. Apply light, continuous pressure and stop every 3 seconds to let heat dissipate. For acrylic, dip the bit in water between passes.
Emergency Fix for Melted Holes
If you accidentally melt the plastic, sand the edges smooth with 220-grit paper. To restart drilling, cool the area with an ice cube for 30 seconds—this temporarily hardens the material. Never use steel wool; it creates static that attracts dust and worsens melting.
Tile Drilling Without Cracks: Water Cooling Method
Tile’s brittleness demands a specialized approach. Start by taping the drilling area with masking tape to prevent bit slippage. Use a diamond-tipped core bit in a brace (not a pin vise—too weak). Dip a sponge in water, then hold it against the bit as you drill at 50 RPM with feather-light pressure. The water cools the bit and washes away ceramic dust that causes overheating cracks.
Critical Angle Trick
Begin drilling at a 45-degree angle for the first 1/8 inch to create a stable groove. Only then shift to 90 degrees. If water splashes everywhere, wrap a damp rag around the bit—it stays in place via centrifugal force and provides constant cooling. Stop immediately if you hear a high-pitched squeal; that’s the sound of imminent cracking.
Bow Drill Technique for Wilderness Hole-Making
When you’re stranded with only a shoelace and stick, this ancient method drills wood, bone, or soft stone. Carve a straight spindle from hardwood (like oak), then notch one end into a chisel point. Wrap a shoelace around the spindle, anchor one end to a fixed bow, and grip the top with a handhold stone. Move the bow smoothly back-and-forth while applying downward pressure. Sand mixed with water at the tip acts as an abrasive to grind the hole.
Why Consistency Beats Speed
Frantic bowing generates heat but little progress. Maintain a steady rhythm—like sawing wood—for 30 seconds, then pause to clear debris. For leather or thin wood, skip the sand; the spindle alone creates clean holes. This method takes patience (5+ minutes per hole), but it’s foolproof when no tools exist.
Burn Clean Holes in Leather with a Hot Nail
Leather demands precision without fraying. Heat a large nail in a campfire or stove until glowing red (use pliers!). Blow out any embers, then press the nail straight through the leather with steady pressure—never twist. The heat cauterizes fibers, preventing unraveling. For multiple identical holes, create a cardboard template to ensure perfect spacing.
Safety First for Fire Methods
Always work outdoors or near a window for ventilation. After burning your hole, dip the leather in cold water to stop smoldering. Never use gasoline or accelerants—residual fumes can ignite when reheating the nail. Test on scrap leather first; too much heat melts synthetic materials.
Critical Safety Steps Before Manual Drilling
Skipping these steps risks injury or ruined projects. Always clamp your workpiece—never hold it in your lap. Wear ANSI-approved safety glasses; hand tools eject sharp debris at high speed. For heated methods, use heavy leather gloves and fire-resistant surfaces. When drilling overhead, secure the tool in a vise and work below it to avoid falling onto you.
The Sharpness Rule You Can’t Ignore
A dull bit requires 3x more force, increasing slip risks. Before starting, test your bit on scrap wood: it should shave clean curls, not crush fibers. For metal bits, hone the tip with a diamond file at 60 degrees. A sharp bit drills faster with less effort—making safety and precision automatic.
Final Tip: Practice every technique on scrap material first. Drill a hole in scrap tile before your backsplash, or burn a test hole in leather scraps. This builds muscle memory so your real project succeeds. Remember: manual hole-making isn’t about strength—it’s about rhythm, patience, and respecting the material. With these methods, you’ll never be powerless again. Keep this guide handy, and you’ll drill confidently anywhere, anytime.


