
Drilling holes at precise angles separates amateur projects from professional results. Whether you’re building furniture with pocket hole joinery, creating custom metal brackets, or installing angled fasteners in a home renovation, knowing how to drill angled holes accurately is essential for structural integrity and visual appeal. Most DIYers and even some professionals struggle with bits that wander off course, inconsistent angles that prevent proper assembly, and tear-out that ruins carefully crafted pieces. This guide reveals the proven techniques, specialized tools, and clever workarounds that will transform your angled drilling from frustrating to flawless—no expensive equipment required.
The challenge with how to drill angled holes stems from basic physics: drill bits naturally want to follow the path of least resistance, which is perpendicular to the surface. When you tilt your drill, the bit’s cutting edges engage unevenly, causing deflection and “walking” away from your intended mark. This problem intensifies with harder materials, steeper angles, and deeper holes. Without the right approach, you’ll waste time, materials, and patience trying to align pieces that don’t fit properly. By the end of this guide, you’ll know exactly which tools to use, how to set up foolproof jigs, and the step-by-step process for drilling angled holes with precision every time.
Why Your Drill Bit Wanders When Drilling Angled Holes
Understanding why bits walk is half the battle in mastering how to drill angled holes. When a standard twist bit contacts a surface at an angle, only one cutting edge engages first, creating uneven force that pushes the bit sideways. This problem worsens with dull bits, improper speed settings, or materials with inconsistent density like wood grain. The result? Your hole starts in the wrong place or veers off course, compromising your entire project.
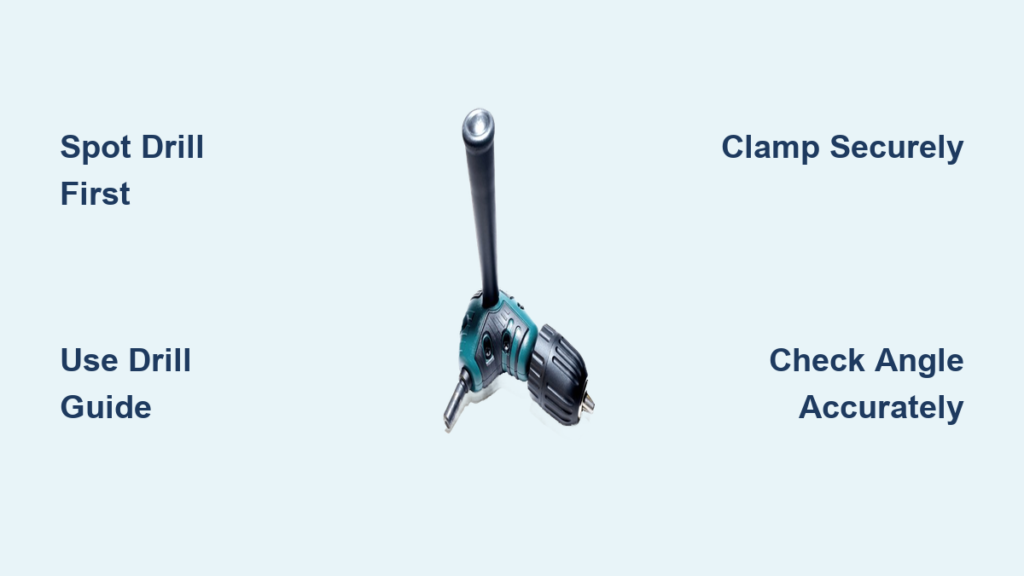
Spot Drilling Technique to Prevent Walking:
1. Mark your exact hole location with a center punch
2. Create a small 90° divot at the mark using a center drill bit
3. Position your drill at the target angle (use a protractor for accuracy)
4. Start drilling slowly until the bit catches in the divot
5. Gradually increase speed while maintaining consistent pressure
This technique works because the initial divot gives the bit a positive starting point, preventing lateral movement as it engages the material at an angle.
Essential Tools for Drilling Perfect Angled Holes
You don’t need a machine shop to drill precise angled holes—just the right tools for the job. Skip generic “tools you’ll need” lists and focus on these angle-specific solutions:
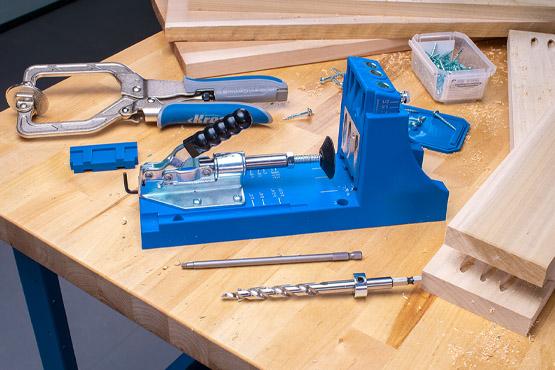
Pocket Hole Jigs for 15-Degree Precision
Kreg-style pocket hole jigs eliminate guesswork for standard angled joinery. These specialized tools clamp your workpiece, guide a stepped drill bit at exactly 15 degrees, and create perfect pocket holes for hidden fasteners. For occasional use, an affordable Kreg jig costs under $50 and pays for itself in saved materials from failed attempts.
Adjustable Drill Guides for Custom Angles
When you need angles beyond 15 degrees, portable drill guides like the Milescraft DrillMate let you lock in any angle from 0-45 degrees. The key is choosing models with hardened steel bushings—they resist wear better than plastic alternatives that quickly enlarge, causing sloppy holes. Set your angle once, clamp the guide securely, and drill multiple identical holes with perfect consistency.
Building Your Own Angled Drilling Jig in 4 Steps
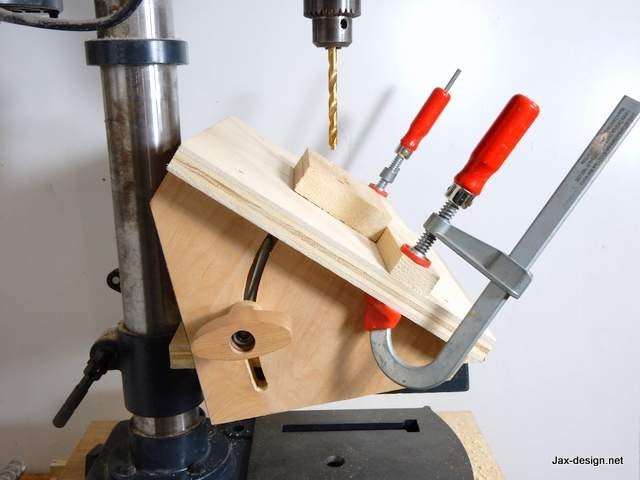
No commercial jig? Create a professional-grade angled drilling jig in 20 minutes with basic workshop tools:
- Cut a hardwood block (3″ x 3″ x 2″) from maple or oak
- Drill a pilot hole through the block at your exact target angle using a drill press
- Enlarge the hole to match your drill bit diameter plus 1/32″ clearance
- Add sandpaper to the base for grip and clamp securely to your workpiece
Pro Tip: For metal work, use a piece of aluminum angle stock clamped at your desired angle as an instant visual and physical guide—no woodworking required.
Step-by-Step: Drilling a 15-Degree Pocket Hole
Follow this exact sequence for flawless pocket holes every time:
Step 1: Mark and Clamp
Place your workpiece in the pocket hole jig, ensuring it’s flush against the fence. Mark the drill depth on your bit with tape—typically 1-1/2″ for 3/4″ material.
Step 2: Start Slowly
Begin drilling at low speed (400-600 RPM) with light pressure. The stepped bit will create a pilot hole followed by the larger pocket section.
Step 3: Watch the Chip Ejection
Healthy drilling produces consistent, spiral-shaped chips. If chips become powdery, you’re drilling too fast; if they’re large chunks, increase speed slightly.
Step 4: Stop at the Mark
When the tape mark reaches the jig surface, stop immediately. Overdrilling weakens the joint and creates unsightly blowout.
Avoiding Tear-Out: Angled Drilling in Wood and Composites
Tear-out on the exit side ruins otherwise perfect angled holes. Prevent this common frustration with these material-specific techniques:
- Solid Wood: Place a sacrificial backer board behind your workpiece. For end grain, drill from both sides—start with a shallow hole from one side, then complete from the opposite direction.
- Plywood and MDF: Use a brad point bit and reduce speed by 20%. Apply painter’s tape over the exit area to minimize splintering.
- Carbon Fiber Composites: Drill at half the speed you’d use for wood with a diamond-coated bit. Backer boards are essential—composites delaminate easily without support.
Drilling Angled Holes in Metal Without a Drill Press
You don’t need a drill press to drill precise angled holes in metal—just these critical adjustments:
- Use a spotting drill bit to create a precise starter hole
- Apply cutting fluid continuously (never skip this step with metal)
- Reduce speed by 30% compared to straight drilling
- Peck drill every 1/8″—withdraw to clear chips and prevent heat buildup
- Use carbide-tipped bits for steel or hard alloys
Critical Warning: Never force the drill bit when working with metal. Let the bit cut at its own pace—excessive pressure causes deflection and broken bits.
How to Verify Your Angled Hole Accuracy

Don’t assume your hole is at the correct angle—verify with these simple methods:
- Angle Gauge Method: Insert a dowel into the hole and measure the angle against a reference surface with a digital angle finder
- Test Fit Technique: Dry-assemble your project immediately after drilling—if parts don’t align smoothly, your angles are inconsistent
- Shadow Method: Shine a light across the hole entrance; an uneven shadow indicates angle inaccuracy
For critical applications, measure hole location at both entry and exit points to confirm the bit didn’t deflect during drilling.
Common Angled Drilling Mistakes That Ruin Your Project
Avoid these costly errors that even experienced DIYers make:
Mistake #1: Skipping the center punch
Without a positive starting point, your bit will walk 9 times out of 10 on angled surfaces.
Mistake #2: Using worn drill guide bushings
Enlarged bushings cause bit deflection—replace them when you notice inconsistent hole placement.
Mistake #3: Clamping the workpiece only at one point
Insufficient clamping allows movement during drilling, ruining angle precision. Always use multiple clamps.
Mistake #4: Rushing the breakthrough
The final 10% of drilling requires reduced pressure to prevent tear-out and maintain angle accuracy.
Advanced Technique: Drilling Compound Angles for Complex Projects
When you need holes angled in two directions (like stair rail brackets), create a custom angled jig block with these steps:
- Cut a hardwood block with one face at your first angle
- Mount this block in a second jig set to your second angle
- Drill through both jigs to create the compound angled guide hole
- Clamp this master jig to your workpiece for perfect replication
For one-off projects, mark both angle references on your workpiece and use a combination square as a visual guide while drilling slowly.
Mastering how to drill angled holes transforms your capabilities as a woodworker, fabricator, or DIYer. The secret lies not in fancy equipment but in understanding the physics of angled drilling and applying the right technique for your specific material and angle requirements. Start with the spot drilling technique for your next project—you’ll immediately notice less bit walking and cleaner holes. For frequent angled drilling, invest in a quality adjustable guide with metal bushings; it will pay dividends in saved materials and frustration. Remember that precision comes from preparation: take time to mark accurately, secure your workpiece properly, and verify your setup before drilling. With these techniques, you’ll consistently achieve professional results that fit together perfectly, every time.


