
You’ve measured twice, marked your spot, and now face the daunting task of drilling a 2-inch hole through concrete for that new plumbing line or electrical conduit. Standard masonry bits simply won’t cut it—literally. Attempting this job with improper tools leads to broken bits, ruined weekends, and potentially dangerous situations with silica dust exposure. This guide reveals the professional methods that guarantee a clean, precise 2-inch hole while protecting your health and equipment.
Most DIYers quickly discover that standard hammer drills and masonry bits fail catastrophically when tackling holes larger than 1 inch in concrete. The physics simply don’t work—concrete’s hardness combined with the massive surface area of a 2-inch bit creates impossible torque and heat conditions. But don’t despair: professional concrete coring techniques exist specifically for this purpose, and with the right approach, you can achieve professional results whether you’re running conduit through a foundation wall or installing a new drain line.
Why Diamond Core Drilling Beats Standard Methods for 2-Inch Holes

Standard hammer drills and masonry bits fail completely when attempting 2-inch holes in concrete. The massive surface area creates excessive friction that either overheats and destroys the bit or stalls the drill motor entirely. Even heavy-duty rotary hammers struggle with this task, often producing rough, jagged holes that require extensive cleanup.
How Diamond Core Bits Actually Cut Through Concrete
Diamond core bits don’t “drill” like conventional bits—they grind. The diamond-impregnated segments along the bit’s edge slowly abrade the concrete through a grinding action rather than chipping it away. This process creates significantly less vibration while producing a smooth-walled hole perfect for pipe installation.
Key advantages over standard methods:
* Precision: Delivers a perfectly round, dimensionally accurate 2-inch hole with parallel sides
* Speed: Completes an 8-inch thick concrete wall in 2-5 minutes versus 30+ minutes with alternative methods
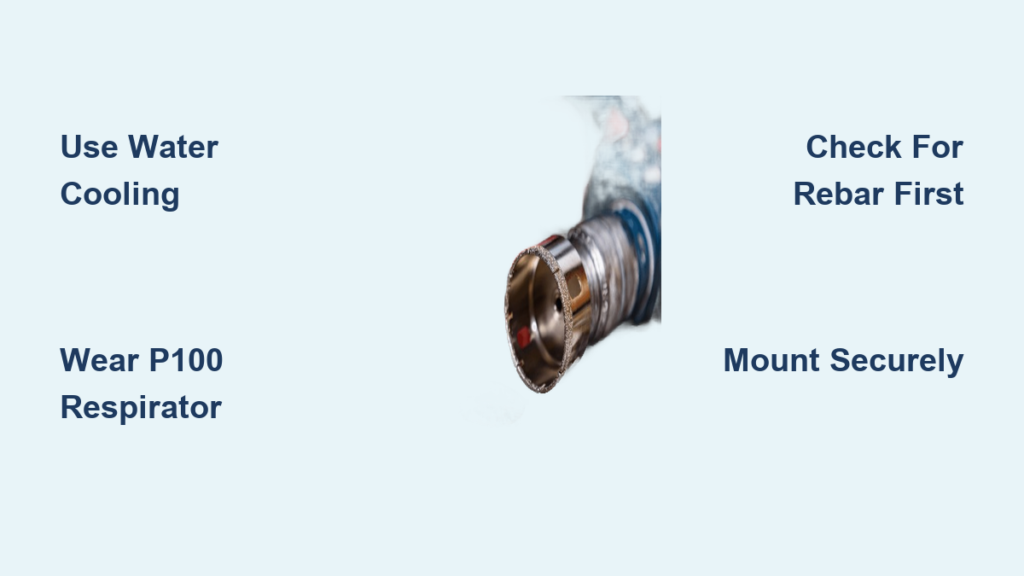
* Cleanliness: Water-cooled operation reduces hazardous silica dust by over 90%
* Bit longevity: Properly used diamond bits can drill hundreds of linear inches before needing replacement
Recognizing When Standard Tools Will Fail You
If you attempt a 2-inch hole with a standard rotary hammer and masonry bit, watch for these failure signs:
* The bit stops progressing after 1-2 inches despite heavy pressure
* Smoke or burning smell from overheating bit
* Visible glazing (shiny surface) on the carbide tips
* Excessive vibration that makes the tool difficult to control
These aren’t signs you need to push harder—they’re warnings that your equipment is failing. Continuing will destroy your bit and potentially damage the concrete surface around your hole.
Essential Safety Equipment Checklist for Concrete Drilling
Silica dust from concrete drilling isn’t just messy—it’s a serious health hazard that causes incurable lung disease with repeated exposure. Standard dust masks offer zero protection against these microscopic particles. Your safety depends on proper equipment.
Must-Have Respiratory Protection
A properly fitted respirator with P100 (HEPA) filters is non-negotiable. Unlike basic dust masks, these seal tightly to your face and filter 99.97% of airborne particles down to 0.3 microns—the exact size of dangerous silica dust. Fit-testing ensures no leaks around the edges, which is critical for your long-term health.
Complete Safety Gear Requirements
- Eye protection: Impact-rated safety goggles with side shields (regular glasses won’t stop concrete chips)
- Hearing protection: Double protection (earplugs under earmuffs) for core drilling’s 100+ decibel operation
- Hand protection: Heavy-duty work gloves with reinforced palms
- Skin protection: Long sleeves, full-length pants, and a hooded coverall to prevent alkaline concrete dust irritation
Pro Tip: Set up your safety gear before bringing out the drill. It’s tempting to “just mark the spot” without protection, but even positioning the drill creates airborne dust.
Step-by-Step: Mounting Your Core Drill for Perfect Hole Alignment
Improper mounting causes 90% of failed concrete drilling attempts. A wobbling or misaligned core drill will bind, overheat, or produce an angled hole that ruins your project. This critical setup step separates professionals from DIYers.
Drilling Anchor Holes for Rock-Solid Stability
- Position the core drill baseplate over your marked hole location
- Use a level to ensure the baseplate sits perfectly perpendicular to the concrete surface
- Mark 3-4 anchor points through the baseplate’s mounting holes
- Switch to a hammer drill with a 1/2″ masonry bit and drill anchor holes 1.5″ deep
- Insert wedge anchors and tighten them finger-tight
Visual cue: When properly mounted, you should be unable to wiggle the baseplate in any direction. Any movement during drilling will damage your bit and ruin hole precision.
Water Connection Setup: Preventing Bit Damage
Connect your water supply before starting the drill. Use a garden hose with a shut-off valve to control flow to a pencil-thin stream. The water serves three critical purposes:
* Cools the diamond segments to prevent overheating
* Lubricates the cutting action for faster penetration
* Suppresses silica dust by trapping particles in slurry
Warning: Never operate a diamond core bit dry. Just 30 seconds without water can glaze the diamond segments, permanently reducing cutting efficiency.
How to Drill Through Concrete Without Damaging Your Bit
The actual drilling process requires patience and proper technique. Rushing or applying excessive force destroys expensive diamond bits and creates dangerous situations.
Starting the Hole: The Critical First 1/2 Inch
Begin drilling at the lowest speed setting with minimal pressure. Let the diamond segments establish their cutting path for the first 30 seconds. You’ll feel slight resistance as the bit engages the concrete—this is normal. If you feel sudden vibration or hear screeching, stop immediately and check your alignment.
Pro Tip: Place a small piece of masking tape over your marked spot. This prevents the bit from “walking” as you start drilling and creates a cleaner entry point.
Drilling Through Rebar: What to Expect
Most concrete contains reinforcing steel. When your diamond bit encounters rebar:
* The drill speed will noticeably slow
* Water flow may decrease temporarily
* You’ll hear a higher-pitched grinding sound
Don’t panic or increase pressure. Diamond bits cut through rebar effectively but require patience. Maintain steady pressure and let the bit work at its own pace. Forcing it creates excessive heat that damages the diamond segments.
Common 2-Inch Concrete Drilling Mistakes That Waste Time and Money

Even with the right equipment, these preventable errors sabotage drilling projects and destroy expensive tools.
Mistake #1: Skipping the Pilot Hole Check
The problem: Drilling blindly without checking for utilities or rebar patterns.
The consequence: Hitting live electrical wiring or water lines creates dangerous situations and expensive repairs.
How to fix it: Always use a high-quality stud finder with deep-scan capability and scan in multiple orientations before marking your hole location.
Mistake #2: Inadequate Water Flow During Drilling
The problem: Letting water flow stop during drilling, even briefly.
The consequence: Diamond segments overheat and glaze over within seconds, permanently reducing cutting efficiency.
How to fix it: Assign someone to monitor water flow continuously. Keep a backup water source nearby in case your primary supply fails.
When to Call a Professional Concrete Drilling Service
Some situations demand professional expertise rather than DIY attempts, saving you time, money, and potential hazards.
Three Clear Signs You Need a Professional
- Structural concerns: Drilling near corners, edges, or in thin concrete (less than 6 inches thick)
- Multiple holes required: Professionals complete multiple holes faster than DIYers set up for one
- Critical applications: Where hole precision matters for plumbing or electrical installations
Cost reality check: Professional concrete coring services typically charge $200-$500 per hole, but this includes insurance, proper dust containment, and guaranteed results. Compare this to potential costs of damaged equipment ($400+ for a destroyed diamond bit), medical bills from silica exposure, or repairing accidental utility damage.
Final Note: Drilling a 2-inch hole in concrete demands respect for the material and proper techniques. Diamond core drilling with water cooling remains the only reliable method for clean, precise results. While the equipment rental costs ($150-$300) may seem steep for a single hole, they pale in comparison to the risks of improper methods. Always prioritize safety over speed—proper respiratory protection isn’t optional when concrete dust is involved. If you’re uncertain about structural implications or utility locations, hiring a professional delivers peace of mind along with that perfect 2-inch hole. Remember: the right technique with proper safety measures transforms what seems impossible into a manageable task.


