
Being locked out of your home with no spare key in sight creates immediate panic. When traditional lock-picking fails and spare keys are unavailable, drilling a deadbolt becomes your last-resort solution for regaining entry. This destructive method permanently damages the lock mechanism but can save you from costly emergency service calls when executed correctly. Drilling a deadbolt requires precision, the right tools, and strict safety protocols—mistakes can damage your door, create fire hazards, or leave you still locked out. Before grabbing your drill, understand that this technique should only be used on property you legally own or have explicit permission to modify, as unauthorized lock drilling constitutes criminal trespass in most jurisdictions.
Why Standard Deadbolts Fail and When Drilling Is Your Only Option
Deadbolts typically fail due to broken keys inside the cylinder, frozen mechanisms from moisture exposure, or internal component wear after years of use. You’ll know drilling is necessary when the key turns freely without retracting the bolt or when the lock completely seizes with no movement whatsoever. Drilling becomes your only viable option when all non-destructive methods have failed—this includes attempting to use a credit card on spring latches (which won’t work on deadbolts), calling neighbors for spare keys, or contacting building management for master keys. Never attempt to drill a deadbolt if you can see a broken key fragment inside the cylinder; extraction tools should be tried first to avoid compounding the problem.
Critical Safety Gear You Must Wear Before Drilling a Deadbolt
Skipping proper safety equipment while drilling a deadbolt risks serious injury from high-speed metal fragments and toxic dust. Metal shavings generated during drilling can embed in your eyes at velocities exceeding 200 feet per second, causing permanent vision damage. Always wear ANSI Z87+ rated safety goggles that seal completely around your eyes—regular glasses offer zero protection. A respirator with P100 filters is non-negotiable; drilling brass and steel creates fine particles that can cause metal fume fever or long-term respiratory issues when inhaled. Protect your hearing with earmuffs (drilling metal registers 100+ decibels), and wear cut-resistant gloves to shield hands from sharp metal edges after drilling. Keep a Class ABC fire extinguisher within arm’s reach—metal dust is highly flammable and sparks from drilling can ignite it.
Essential Tools: Why Standard Drill Bits Won’t Cut Through Deadbolt Steel

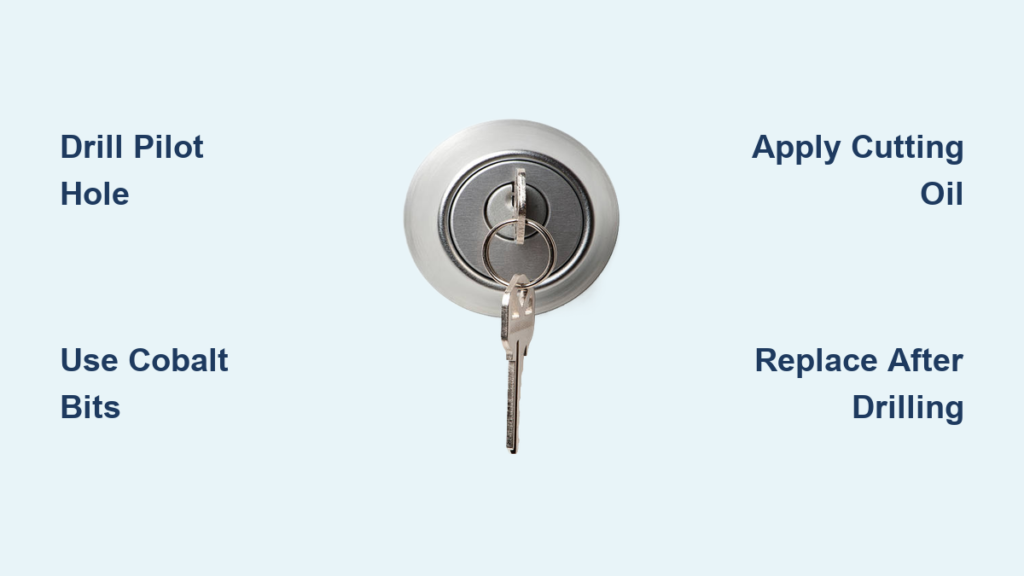
Your household drill bits will shatter immediately when contacting a deadbolt’s hardened steel components. Standard high-speed steel (HSS) bits lack the heat resistance needed to penetrate the lock face, which is typically made of case-hardened steel with a Rockwell hardness of 58-62 HRC. You need cobalt drill bits (HSS-Co) containing 5-8% cobalt, which maintain their edge at temperatures exceeding 1,100°F generated during drilling. A progressive bit set (1/8″, 3/16″, 1/4″, and 5/16″) allows gradual hole enlargement without overloading the drill motor. Never skip the center punch—it creates the critical starting dimple that prevents bit “walking” across the smooth lock face. Cutting oil specifically designed for metalwork (not WD-40) must be applied every 15 seconds to cool the bit and extend its life; without lubrication, bits will dull in under a minute.
Why Corded Drills Outperform Cordless for Deadbolt Drilling
While cordless drills offer convenience, their batteries deplete rapidly when drilling hardened steel—often before creating a usable hole. A 120V corded drill with 1/2″ chuck delivers consistent torque at low speeds (400-600 RPM), essential for maintaining control during this precision task. Corded drills won’t abruptly lose power mid-drill, preventing dangerous bit binding that can twist your wrist or damage the door. If using cordless, select an 18V+ model with brushless motor technology and keep spare batteries charging nearby.
Pre-Drilling Checklist: Avoiding Legal Trouble and Property Damage
Before touching your drill to the lock, verify three critical elements: legal authorization, door construction, and lock type. Drilling a lock you don’t legally control—whether on rental property without landlord consent or a business door—can result in criminal charges and civil liability. For wooden doors, confirm no electrical wiring or plumbing runs within 2″ of the lock location by checking the interior side. Identify your deadbolt type: Kwikset models require drilling at 12 o’clock position above the keyway, while Schlage deadbolts need a 1/4″ offset downward from center. Double-cylinder deadbolts (keys required on both sides) present greater drilling challenges due to reinforced security features. If your lock has electronic components or visible security pins, professional assistance is strongly advised.
Step-by-Step: How to Drill Out a Kwikset Deadbolt in 4 Precise Stages
Kwikset’s residential deadbolts use softer brass cylinders that drill relatively easily compared to commercial-grade locks. Start by placing your center punch precisely at the 12 o’clock position just above the key slot. Deliver one firm hammer strike to create a 1/16″ deep guide dimple—this prevents bit wandering on the smooth metal surface. Apply cutting oil liberally to the punch mark before inserting your 1/8″ cobalt bit.
Stage 1: Creating the Pilot Hole
Drill at 400 RPM with steady, moderate pressure for 20-30 seconds until you penetrate approximately 1/2″ deep. You’ll feel resistance decrease slightly when the bit passes through the outer steel face into the softer brass cylinder. Withdraw the bit every 10 seconds to clear metal shavings and reapply cutting oil. If the bit smokes or turns blue, stop immediately—you’re drilling too fast without sufficient lubrication.
Stage 2: Progressive Hole Enlargement
After completing the pilot hole, switch to a 3/16″ bit and drill another 1/2″ deeper, maintaining the same slow speed and frequent lubrication. Repeat with 1/4″ and 5/16″ bits, drilling incrementally deeper with each size. The critical moment comes when you feel the drill suddenly drop through the cylinder’s pin chambers—this indicates successful destruction of the locking mechanism. Stop drilling immediately at this point to avoid unnecessary damage to the bolt housing.
Stage 3: Bolt Retraction Technique
Insert a sturdy 1/4″ flathead screwdriver into the drilled cavity. Apply clockwise turning pressure while simultaneously pushing the screwdriver inward to mimic key action. Most Kwikset deadbolts will retract with moderate pressure once the cylinder is compromised. If resistance remains, wiggle the screwdriver side-to-side to dislodge any remaining pin fragments before trying again.
What to Do When Your Drill Bit Breaks Inside the Lock Cylinder

Bit breakage typically occurs from excessive pressure, incorrect speed, or inadequate lubrication. If your bit snaps, immediately unplug the drill and assess the situation. Never attempt to drill around the broken bit—this guarantees further complications. Apply penetrating oil liberally into the cavity and wait 15 minutes for it to seep around the broken fragment. Use needle-nose pliers to grip any exposed portion of the bit shank and gently twist counterclockwise while pulling outward. If no portion is visible, insert a left-hand (reverse) drill bit slightly smaller than the broken piece and apply slow reverse pressure—the reverse threading may catch and extract the fragment. If these methods fail, professional extraction becomes necessary.
Post-Drill Actions: Safely Opening Your Door and Removing Metal Shavings
After successfully retracting the bolt, resist the urge to immediately open the door. First, vacuum all metal shavings from the lock cavity using a shop vac with HEPA filter—compressed air will only spread flammable particles. Use a strong magnet to collect residual fragments from the door surface. Attempt to open the door slowly while supporting its weight, as metal debris may have jammed the bolt housing. Once open, inspect the interior lock mechanism for remaining security pins that could prevent proper bolt operation. Never operate the deadbolt repeatedly after drilling—it’s permanently damaged and requires replacement.
Replacing Your Drilled Deadbolt: Measuring for the Correct Replacement
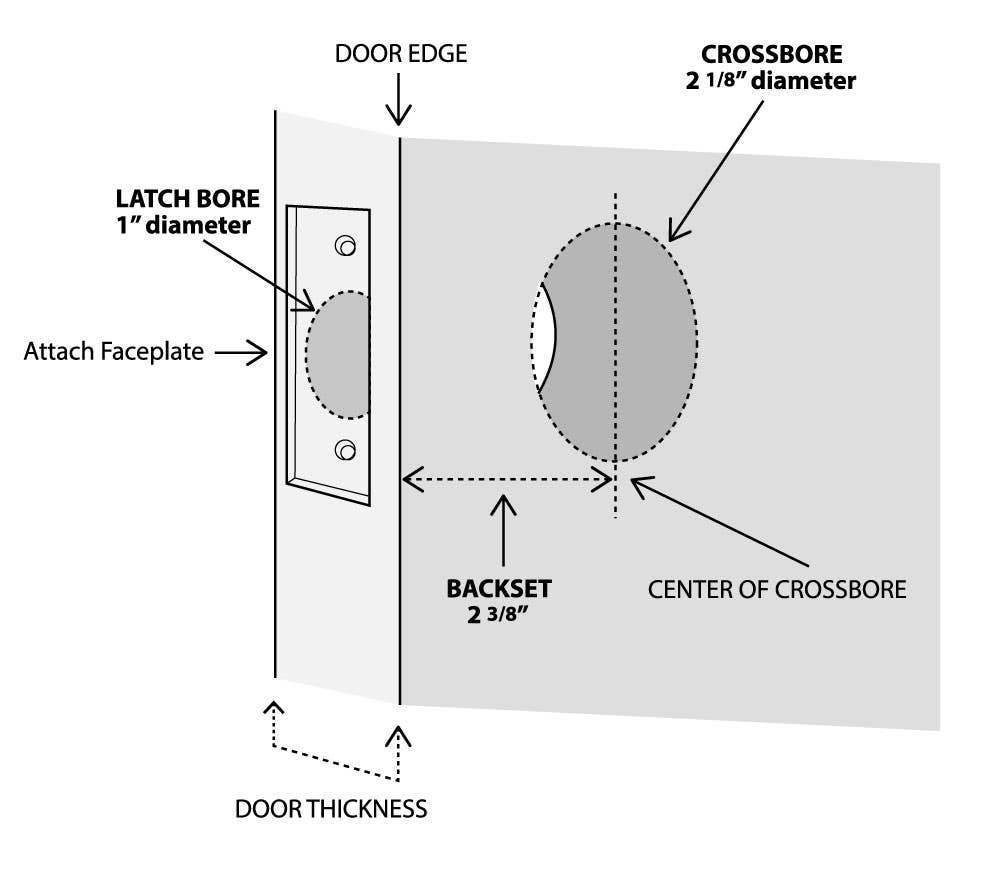
Drilled deadbolts cannot be repaired—replacement is mandatory for security. Measure your door’s backset (distance from edge to center of bore hole), typically 2-3/8″ or 2-3/4″ on residential doors. Note the cross-bore diameter (usually 2-1/8″) and door thickness (standard is 1-3/4″). Remove the old lock by unscrewing the two long mounting screws along the door edge, then extract the entire assembly. Take the old lock to a hardware store to match faceplate style and bolt throw length. When installing the new deadbolt, apply graphite lubricant sparingly to the cylinder—never use oil-based lubricants that attract dust.
When to Call a Locksmith Instead of Drilling Your Deadbolt
Drilling should never be your first option when locked out. Call a professional locksmith if your deadbolt shows any of these red flags: visible security pins through the keyway, electronic components, double-cylinder design requiring keys on both sides, or manufacturer markings indicating high-security construction (Medeco, Mul-T-Lock). Attempting to drill these locks typically wastes time and creates expensive complications. The average professional locksmith gains entry in 10-15 minutes for $150-$250—often cheaper than replacing a door damaged by improper drilling. If you’ve been drilling for more than 20 minutes without success, or if smoke appears, stop immediately and call a professional. Your safety and door integrity outweigh the cost of a service call.
Knowing how to drill a deadbolt provides crucial peace of mind during lockout emergencies, but this skill carries significant responsibility. Proper execution requires respecting both the mechanical complexity of modern locks and the legal boundaries surrounding property access. When performed correctly on appropriate locks, drilling remains a viable last-resort solution that puts you back in control of your property. Remember that every drilled lock must be replaced immediately—temporarily leaving your home unprotected creates greater security risks than the initial lockout. Keep your drill and cobalt bits stored with other emergency tools, but hope you never need them.


