
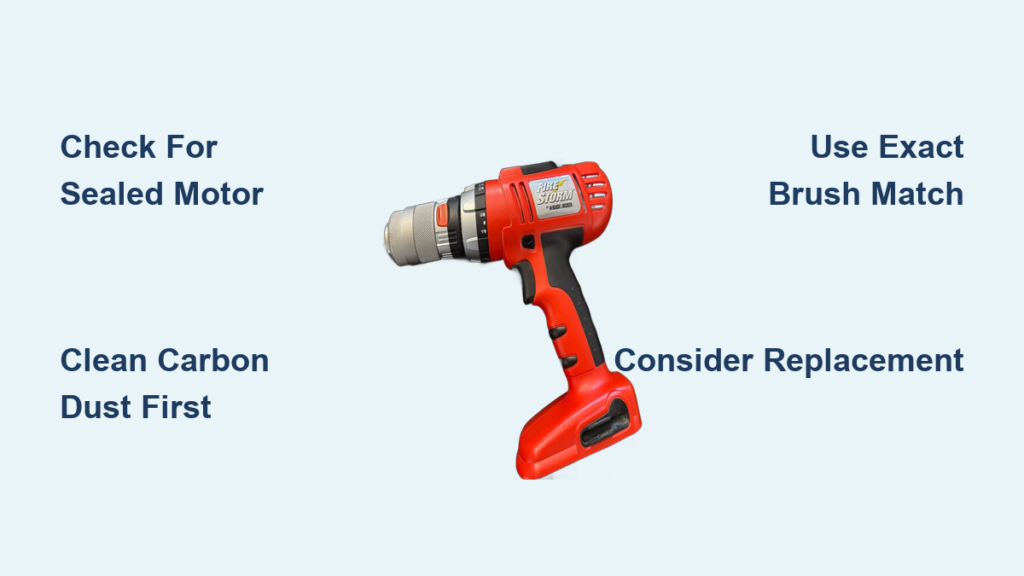
Your Black & Decker PS182 drill suddenly loses power mid-project, sparks alarmingly, or refuses to start altogether. Before you toss it in the trash or buy a replacement, consider the carbon brushes—a small but critical component that’s often the culprit. Understanding how to replace drill brushes could save you money and extend your tool’s life. But here’s the crucial detail many guides omit: the Black & Decker PS182 is typically designed with a non-serviceable motor assembly, meaning brush replacement isn’t always possible for DIYers. This guide cuts through the confusion with specific, model-focused advice you won’t find elsewhere.
Most online tutorials assume all drills have user-replaceable brushes, but modern cordless models like the PS182 frequently feature sealed motor housings where the entire assembly must be replaced. You’ll learn exactly what to look for, when cleaning might solve your problem without disassembly, and how to determine if your specific drill model actually allows brush replacement. We’ll walk through the rare cases where brush replacement is possible while emphasizing safety and realistic expectations for this particular model.
Why Your Drill Brushes Fail (and How to Spot It)
Carbon brushes serve as the electrical lifeline between your drill’s stationary housing and the spinning armature. These small carbon blocks naturally wear down through constant contact with the commutator, eventually becoming too short to maintain proper electrical connection. When this happens, your PS182 exhibits telltale symptoms that distinguish brush problems from other motor failures.
How to diagnose worn brushes in your PS182:
– Reduced power despite a fully charged battery
– Visible blue or white sparks through ventilation slots
– Intermittent operation where the drill works briefly then stops
– Distinct electrical burning smell during use
– Complete failure to start with a faint clicking sound
Before disassembling your drill, rule out simpler issues. Test with multiple charged batteries and check for visible damage to the chuck or drive mechanism. Many PS182 owners mistake carbon dust buildup for worn brushes—this conductive debris can cause shorting that mimics brush failure. Your first troubleshooting step should always be thorough cleaning before considering how to replace drill brushes.
Critical Safety Steps Before Touching Your Drill
Unplug and remove all power sources—this is non-negotiable. Even a “dead” battery can deliver a dangerous shock if mishandled during motor work. Lay your drill on a clean, non-conductive surface away from metal objects. Gather these essential tools: Phillips and precision screwdrivers, plastic spudger (not metal!), electrical contact cleaner, and compressed air.
The PS182’s compact design means delicate wiring runs through tight spaces. Before removing any screws, take clear photos of the internal layout with your phone. Note how wires connect to the trigger switch and motor terminals—reassembly mistakes here can permanently damage your drill. If you don’t have experience with small electronics, reconsider attempting brush replacement on this model, as the PS182’s tight internal layout leaves little room for error.
PS182 Reality Check: Is Brush Replacement Even Possible?

Here’s what most generic “how to replace drill brushes” guides won’t tell you: the Black & Decker PS182 typically features a sealed motor assembly where brushes aren’t designed for user replacement. Unlike older corded drills with accessible brush caps, this cordless model integrates the brushes into a non-serviceable motor housing. When you open the clamshell casing, you’ll likely find a single metal motor can permanently secured with rivets or special screws requiring manufacturer-specific tools.
If your PS182 has visible metal latches around the motor housing, you might access the assembly—but don’t expect to simply slide out worn brushes. In most cases, the entire motor unit must be replaced as a single component. Check your specific model number carefully; some PS182 variants differ internally. If you encounter a motor housing with no visible brush access points after disassembly, attempting to force entry will destroy your drill.
The Cleaning Fix That Solves 80% of “Brush Problems”
Before you attempt how to replace drill brushes on your PS182, try this five-minute cleaning method:
1. Remove the battery and set the drill to its lowest torque setting
2. Use compressed air to blast carbon dust from all ventilation slots
3. Apply electrical contact cleaner to the commutator through the vents
4. Rotate the chuck manually while spraying to clean all contact points
5. Let the drill dry completely before testing
This simple procedure resolves most “brush failure” symptoms in PS182 models because carbon dust buildup—not worn brushes—causes the majority of electrical issues. The conductive debris creates short circuits that mimic brush wear. For heavy users, perform this cleaning every 10-15 hours of operation to prevent problems. If your drill runs smoothly after cleaning, you’ve avoided unnecessary disassembly that could void your warranty.
Step-by-Step: If Your PS182 Actually Has Replaceable Brushes
Important: This procedure applies ONLY if your specific PS182 variant has serviceable brushes (rare). If brushes aren’t visibly accessible after opening the housing, STOP.
How to Access the Motor Assembly
- Remove all visible screws securing the plastic housing (typically 6-8)
- Gently separate the clamshell casing using a plastic spudger
- Disconnect the trigger switch wiring harness (note connector orientation)
- Locate the motor assembly secured to the gearbox with metal latches
Brush Removal and Replacement
- Carefully remove the metal latches arranged circularly around the motor housing
- Extract the plastic housing containing the rotor and brush assembly
- Locate the brush holders (small rectangular slots with springs)
- Remove worn brushes and springs—note their orientation
- Insert new brushes matching the originals exactly (size and connector type)
- Reattach brush pigtails to terminals if present (soldering may be required)
Critical Reassembly Tips
- Route wires precisely as they were originally positioned
- Ensure no screws pinch internal wiring
- Test operation before fully reassembling the housing
- Never force components—PS182 plastic housings crack easily
Brush Compatibility: Finding the Exact Right Replacement
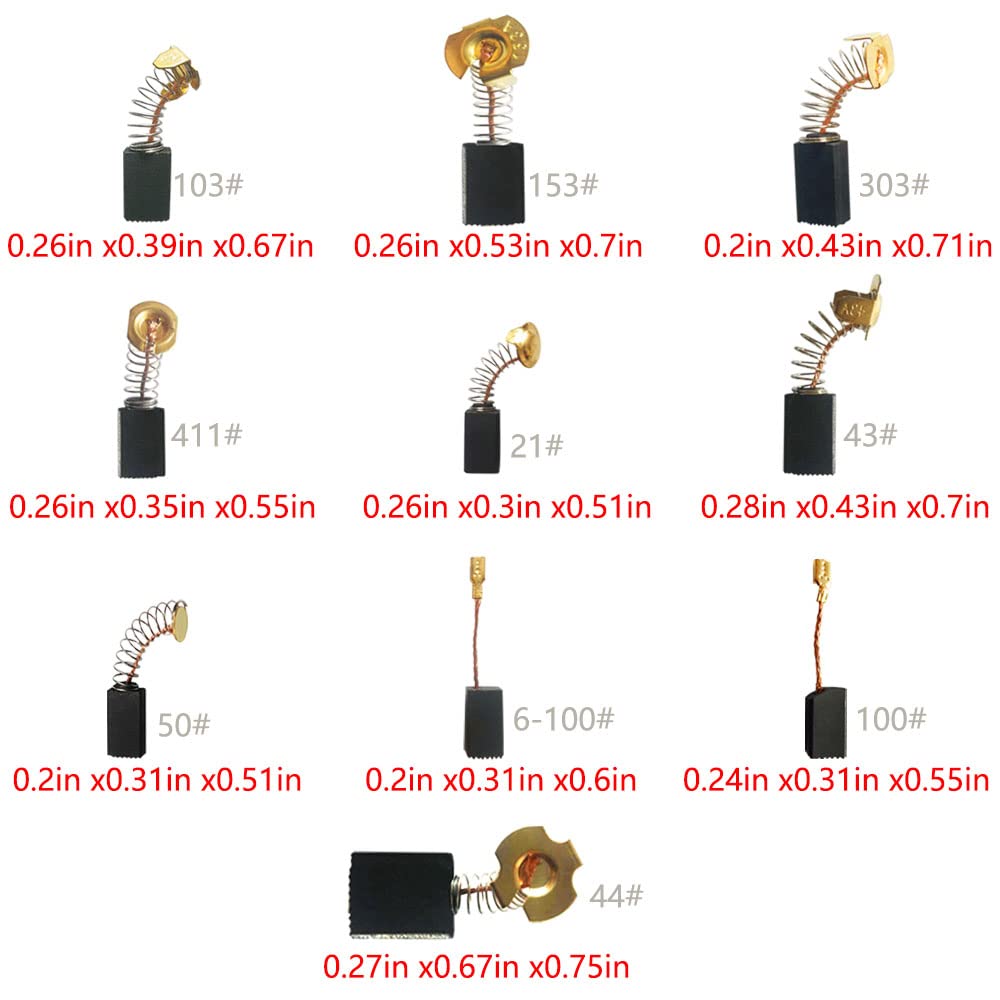
Using incorrect brushes destroys motors. For the rare PS182 models with replaceable brushes, you need:
– Exact carbon composition matching the originals
– Identical physical dimensions (measure old brushes first)
– Correct spring tension specifications
– Matching electrical resistance values
Generic “universal” brush kits often fail in Black & Decker tools. Contact Black & Decker directly with your model number to determine if service parts exist. If they tell you the motor is non-serviceable (as they typically will for PS182), attempting replacement with aftermarket brushes risks permanent damage. Genuine replacement brushes for this model are virtually unavailable to consumers—further evidence that brush replacement isn’t intended for user maintenance.
When Professional Service Beats DIY Brush Replacement
Seek professional help if:
– Your PS182 is under warranty (DIY voids coverage)
– You encounter riveted or sealed motor components
– Brush terminals require soldering (risk of heat damage)
– Replacement parts aren’t clearly available
For most PS182 owners, professional motor assembly replacement costs $40-$60—approaching the value of an older drill. Compare this to a new PS182’s $50-$70 price point. Unless your drill is relatively new or sentimental, replacement often makes more financial sense than professional brush service. Many authorized Black & Decker service centers won’t even attempt brush replacement on this model, opting instead to install a complete new motor assembly.
Preventing Future Brush Problems: Maintenance Schedule
Extend your PS182’s life with these simple habits:
– Blow out carbon dust after every 5-10 uses with compressed air
– Avoid maximum continuous runtime (let the drill cool periodically)
– Never operate at full speed under heavy load for extended periods
– Store with battery removed in a dry environment
Unlike older drills with accessible brushes, the PS182’s sealed design means you can’t visually inspect brush wear. Instead, monitor performance changes and clean regularly. When sparking or power loss occurs despite cleaning, consider the motor assembly’s end-of-life rather than attempting how to replace drill brushes on this non-serviceable model.
Should You Repair or Replace? The PS182 Cost Analysis
For drills under one year old, contact Black & Decker for warranty service—don’t attempt DIY. For older models, calculate:
– New PS182 cost: $50-$70
– Professional motor replacement: $40-$60 + labor
– DIY risk: High chance of permanent damage to a $50 tool
Unless you’re maintaining multiple tools as a hobbyist, replacement beats repair for the PS182. Modern power tools are designed as consumable products with non-serviceable components. Investing time in how to replace drill brushes on this model often yields frustration rather than functional tools. When your PS182 finally gives out, consider upgrading to a professional-grade model with serviceable components if repairability matters to you.
Final Note: While understanding how to replace drill brushes remains valuable knowledge for older tools, the Black & Decker PS182 exemplifies modern power tool design where brush replacement isn’t practical for consumers. Focus instead on proper maintenance to maximize your drill’s lifespan, and recognize when replacement represents the most sensible solution for this particular model. Always prioritize safety—when in doubt, consult a professional rather than risking injury or further damage to your tool.


