
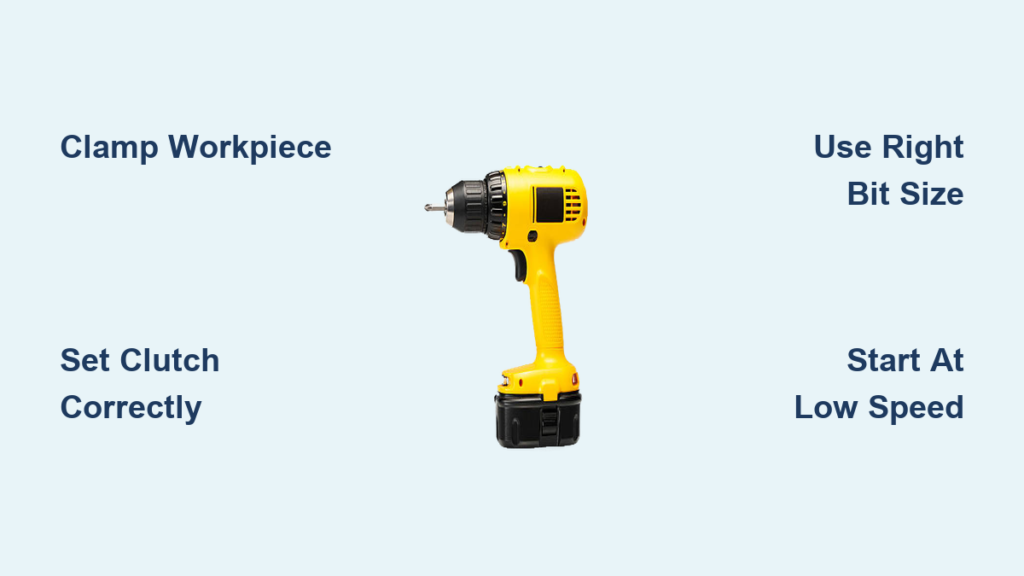
Holding your first cordless drill can feel like wielding a superpower—until you strip your first screw or drill crooked holes. You’re not alone; nearly 70% of DIY beginners struggle with basic drill operation according to home workshop surveys. The right technique transforms your cordless drill from a frustrating tool into your most reliable project partner. This guide cuts through the confusion with specific, actionable steps that work whether you’re assembling furniture or building a deck. You’ll master clutch settings, bit selection, and drilling techniques that prevent common mistakes—saving you time, materials, and frustration on every project.
Why Your Drill Won’t Drill Straight (And How to Fix It Immediately)
The moment your drill bit wanders off course, frustration sets in. This happens because most beginners skip proper setup before pulling the trigger. Your drill needs three critical elements to drill accurately: a secure workpiece, precise marking, and controlled starting technique. Clamp your material firmly—never hold it with your foot or hand. Mark your spot with a center punch or nail to create a guide dimple. Hold the drill perpendicular to the surface with both hands: your dominant hand on the trigger, your guide hand stabilizing the front. This two-handed grip prevents wobble that causes crooked holes.
Stop Drill Bit “Walking” with This Pro Technique
When drilling into smooth surfaces like metal or finished wood, bits naturally slide off target. Create an instant anchor point by starting at the lowest speed setting with minimal pressure. Let the bit create a small dimple before increasing speed. For metal work, apply cutting fluid to reduce heat and improve bit grip. On wood, use a scrap board underneath your workpiece to prevent tear-out when the bit exits. If you’re drilling into tile or glass, start with a nail set and hammer to create a starting point that prevents slipping.
How Much Pressure to Apply When Drilling Different Materials
The right pressure varies dramatically by material. For softwoods, use firm, steady pressure you’d use to push a shopping cart. Hardwoods require lighter pressure—think of pressing a button on a remote control. Metal demands the lightest touch possible; excessive pressure causes bits to overheat and lose temper. Let the drill’s torque do the work rather than muscle. If you hear squealing or see smoke, you’re pressing too hard. Withdraw the bit frequently to clear chips—every 1/4 inch in metal, every 1/2 inch in wood.
How to Set the Clutch for Perfect Screw Depth Every Time
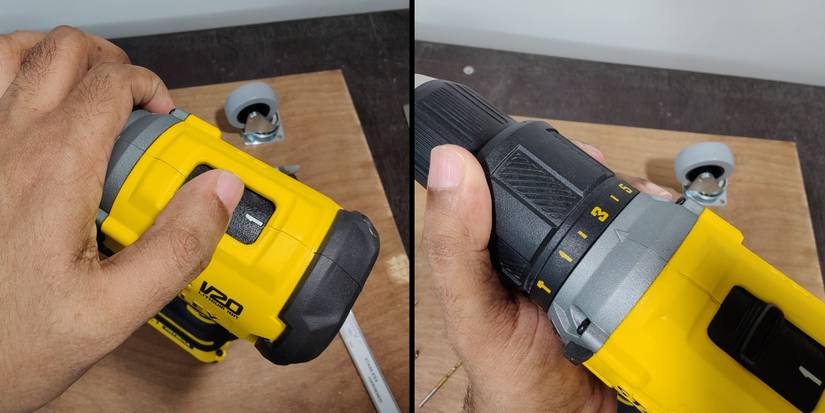
That clicking sound when driving screws isn’t a malfunction—it’s your clutch working correctly. Most beginners set the clutch too high, stripping screw heads or sinking screws too deep. Start with the clutch ring set to 3 for #6-8 screws in softwood. Test on scrap material: if the screw stops before seating flush, increase the setting by 1. If the screw strips or drives too deep, decrease the setting. For hardwoods or dense materials, use settings 5-8. When driving into metal or plastic, reduce to settings 2-4 to prevent stripping. The clutch should slip just as the screw head meets the surface.
Why Your Screwdriver Bit Slips Out (And How to Prevent It)
Bit slippage happens when the chuck isn’t tightened sufficiently or you’re using worn bits. Insert the bit so at least 3/4 inch sits inside the chuck. For keyless chucks, close the jaws fully by rotating the chuck sleeve clockwise while holding the drill body. Test by trying to rotate the bit with your fingers—it shouldn’t move. Use magnetic bits for better retention, and replace worn bits immediately (look for rounded tips or stripped grooves). Always align the bit perfectly perpendicular to the screw head before applying pressure.
Selecting and Installing Drill Bits Like a Professional
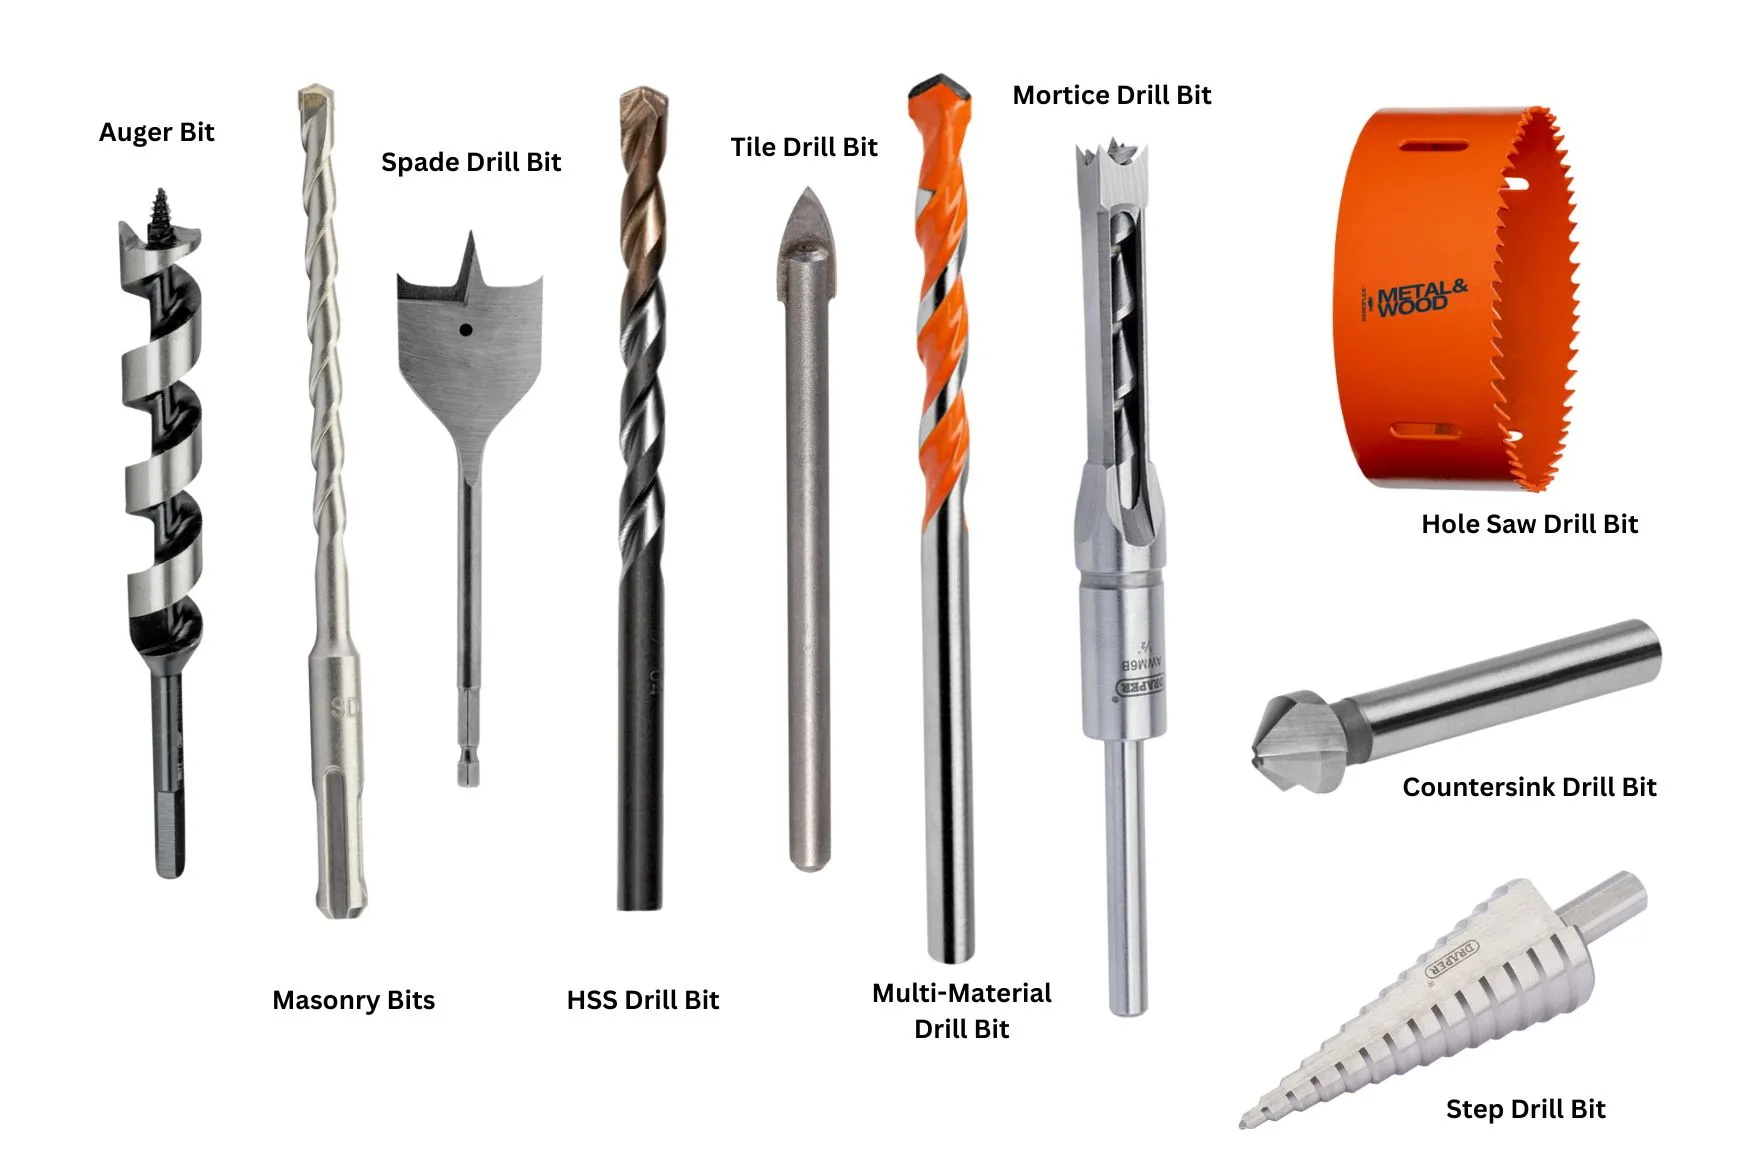
Using the wrong bit is the #1 cause of drilling failures. Twist bits work for wood and soft metals but will dull quickly on masonry. For brick or concrete, you need carbide-tipped masonry bits that can handle hammer drilling. High-speed steel (HSS) bits handle metal best, especially when used with cutting fluid. Match bit size precisely to your task: a 1/8-inch bit for #8 screws, 3/16-inch for 1/4-inch anchors. The bit’s diameter should equal the screw’s shank width, not the threads.
How to Change Drill Bits in 20 Seconds (Without a Key)
Keyless chucks save crucial time during projects. Open the chuck by rotating the sleeve counterclockwise while holding the drill body. Insert your bit fully, then close the chuck by rotating clockwise with firm hand pressure. For maximum security, give the chuck one final tighten by pulling the trigger while holding the chuck stationary. Test by trying to twist the bit—it shouldn’t rotate. If your chuck slips during operation, clean the jaws with a small brush to remove debris affecting grip.
Why Your Cordless Drill Loses Power Mid-Project
Nothing kills momentum like a dying battery halfway through drilling. Modern lithium-ion batteries deliver consistent power until they suddenly drop off. Check your battery indicator before starting—never begin a critical task with less than 3 bars. For extended projects, keep a spare charged battery ready. If your drill seems weak despite a full charge, clean the metal contacts on both the battery and drill with a pencil eraser to remove oxidation. Store batteries at 40-60% charge when not in use for more than two weeks to maximize lifespan.
How to Drill Through Metal Without Breaking Bits
Metal drilling requires different technique than wood. Start with a center punch mark to prevent bit wandering. Use cutting fluid or light machine oil on the drilling spot—this reduces heat and extends bit life. Begin at the lowest speed setting (position 1 on your gear selector) with light pressure. As the bit penetrates, increase pressure slightly but never force it. Withdraw frequently to clear metal shavings that cause overheating. For thick metal, drill a pilot hole first with a smaller bit before enlarging to final size.
Preventing Split Wood When Drilling Pilot Holes

Pilot holes prevent splitting but create their own challenges. Use a bit 1/64 inch smaller than the screw’s shank diameter. Drill the pilot hole to the same depth as the screw’s threaded portion—not the entire screw length. For hardwoods like oak or maple, drill the pilot hole slightly deeper than the threads to allow wood fibers to compress. When drilling near edges, position the hole at least 1.5 times the screw’s diameter from the edge. Angle your drill slightly away from the edge to prevent breakout.
Essential Safety Steps Before Every Drill Operation
Skipping safety checks causes most drill-related injuries. Always wear ANSI-approved safety glasses—metal shavings or wood chips travel at high speed. Remove loose jewelry and secure long hair before starting. Verify the workpiece is clamped securely—never hold material with your hand. Check that the forward/reverse switch is set correctly before pulling the trigger (forward for drilling, reverse for removal). Keep your fingers clear of the chuck area during operation. Unplug or remove the battery when changing bits on corded drills.
Troubleshooting Common Drill Problems in 60 Seconds
When your drill malfunctions, systematic diagnosis saves time. If the drill won’t start, check battery charge first—many indicators show false positives. Clean battery contacts with a dry cloth. If the chuck won’t tighten, check for debris in the jaws. For unusual noises, inspect the bit for damage or improper installation. If the drill spins but won’t drill, the clutch may be set too low or the bit is dull. When the drill overheats, stop immediately—let it cool for 15 minutes before continuing. Persistent issues often indicate worn brushes needing replacement.
How to Maintain Your Cordless Drill for Years of Reliable Service
Proper maintenance doubles your drill’s lifespan. After each use, wipe the housing with a dry cloth to remove dust and debris. Clean the chuck jaws monthly with a small brush—compressed air works well for stubborn particles. Store bits in a dedicated case to prevent damage. Check the chuck periodically for play—if you can wiggle the bit when tightened, the chuck needs replacement. For long-term storage, remove the battery and store it at 40% charge in a cool, dry place. Lubricate moving parts annually with light machine oil.
Mastering cordless drill operation transforms frustrating projects into satisfying accomplishments. By implementing these specific techniques—from precise clutch settings to material-specific drilling methods—you’ll achieve professional results on every task. The key isn’t owning expensive equipment but understanding how to use what you have correctly. Start with small practice projects to build muscle memory, then tackle larger jobs with confidence. Remember that every expert started exactly where you are now—with a drill in hand and a project waiting to happen. Your next perfectly drilled hole or perfectly seated screw is just one proper technique away.


