
Drilling precise, clean holes in wood, metal, or plastic separates amateur projects from professional results. While handheld drills offer mobility, they lack the accuracy and consistency needed for repeatable work—especially when tackling metal, dense hardwoods, or multiple identical holes. The drill press solves this by anchoring your workpiece securely while delivering perfect perpendicularity and depth control with every plunge. Yet many beginners avoid this powerhouse tool, intimidated by its spinning chuck and exposed mechanics.
Mastering how to operate a drill press transforms your workshop capabilities, enabling everything from furniture joinery to engine repairs. But skipping proper setup or safety steps risks ruined materials, damaged bits, or serious injury. This guide cuts through the confusion with field-tested techniques used by woodworkers and machinists daily. You’ll learn not just the mechanics of pulling the lever, but how to configure your machine for flawless results on your first attempt—whether you’re drilling a pilot hole in pine or a countersink in aluminum.
Forget vague advice about “reading the manual.” We focus on actionable steps that work across most benchtop and floor-standing models. By the end, you’ll confidently handle bit changes, speed adjustments, and depth control while avoiding the top three mistakes that send beginners to the emergency room. Let’s turn that intimidating column of cast iron into your most trusted workshop ally.
Essential Safety Gear and Preparation
Your drill press demands respect before the motor even spins. Ignoring preparation turns a precision tool into a projectile hazard—loose sleeves, dangling necklaces, or unsecured workpieces become entanglement risks within seconds. Start by clearing your workspace of sawdust piles, tools, or extension cords that could trip you mid-drill. Ensure bright, shadow-free lighting so you see chip buildup and bit alignment clearly.
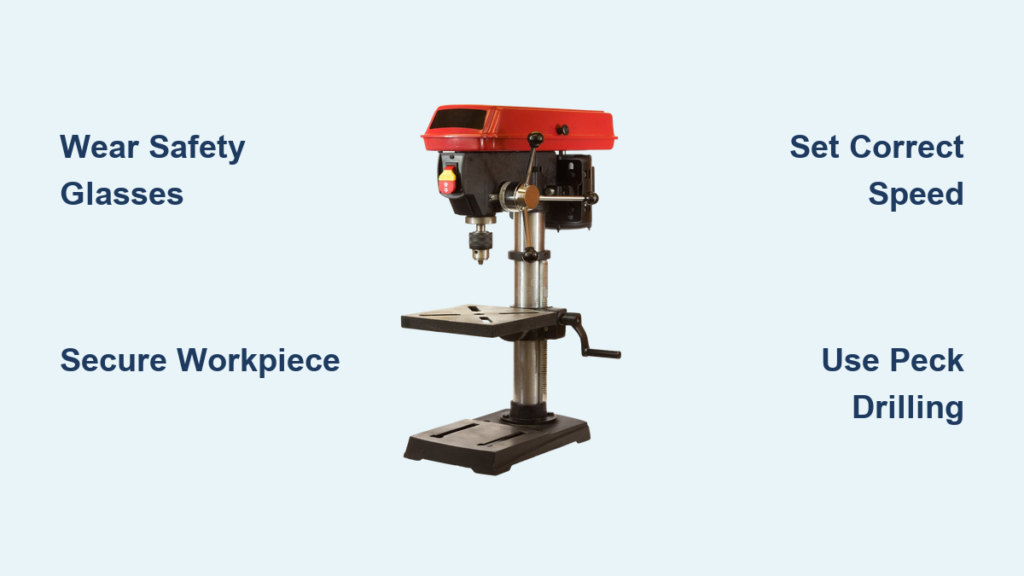
Non-negotiable personal protection begins with ANSI-approved safety glasses. Metal drilling creates microscopic shards moving at 500+ RPM; a single fragment can permanently blind you. Skip gloves entirely—they snag on rotating chucks—and tie back long hair under a cap. Wear fitted clothing without cuffs or drawstrings. For metalwork, add hearing protection against high-pitched whine and an N95 mask to avoid inhaling toxic metal dust. Crucially, inspect your machine: verify emergency stop buttons function, belts aren’t frayed, and the table locks securely at your working height.
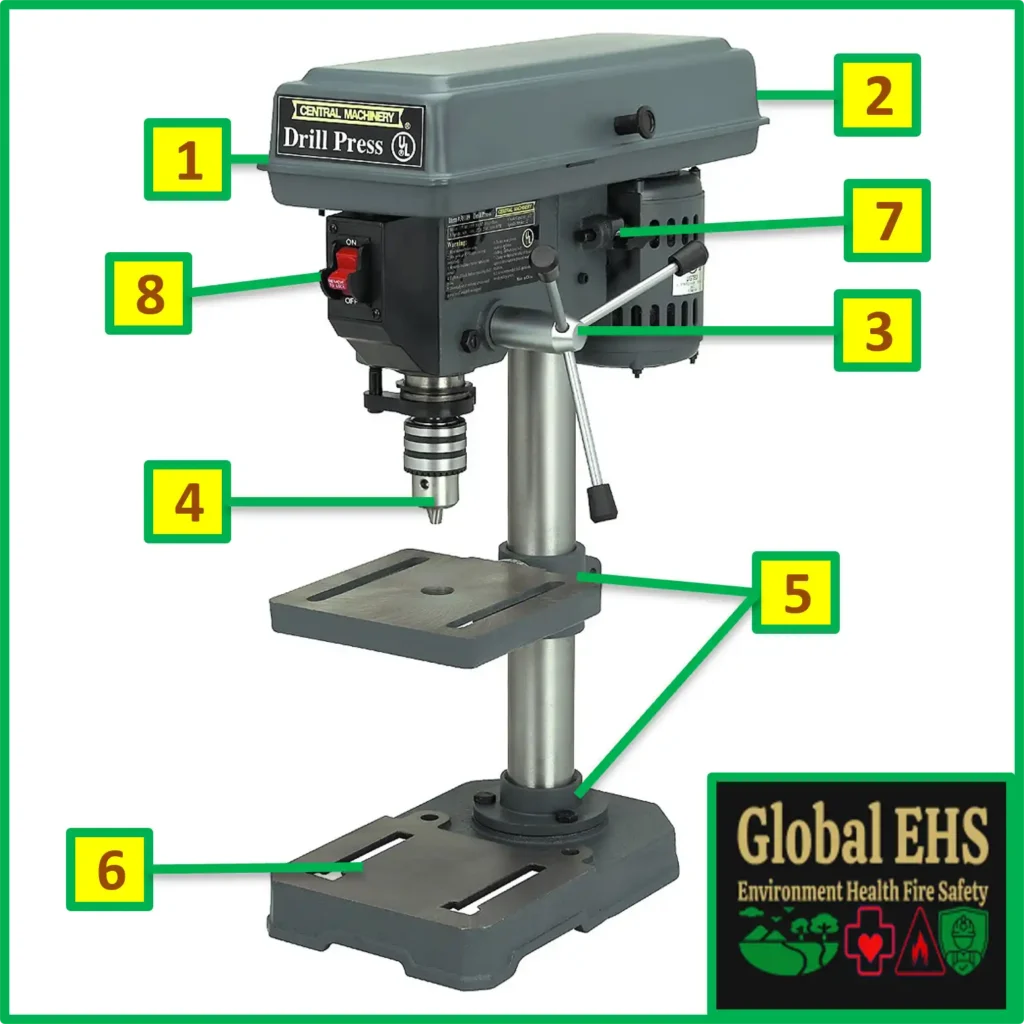
Know your machine’s anatomy before touching the power switch. Locate the depth stop rod (prevents over-drilling), table height crank (adjusts workpiece clearance), and quill lock (secures spindle position for bit changes). Identify the chuck key slots—three evenly spaced holes on the chuck collar—and confirm the motor’s on/off switch isn’t blocked. Test the feed handle’s smooth motion while the machine is off; gritty resistance indicates needed lubrication. This 60-second checklist prevents 90% of beginner accidents.
Why Skipping PPE Causes Catastrophic Injuries
Metal drilling produces “chips”—not dust, but razor-sharp curls that ricochet unpredictably. A woodworker drilling a steel bracket once suffered a corneal laceration when a chip deflected off his vise. Similarly, loose sleeves caught in the chuck have amputated fingers in documented workshop incidents. These aren’t hypotheticals; they’re OSHA violation reports. Your safety gear isn’t optional theater—it’s your last line of defense when chips fly toward your face at 3,000 RPM.
Step-by-Step: Operating Your Drill Press
Selecting and Installing the Correct Drill Bit
Match your bit to the material: high-speed steel (HSS) twist bits for wood and soft metals, cobalt bits for hardened steel, and brad-point bits for clean entry in plywood. Never exceed 1/3 the bit’s diameter for feed depth per revolution—e.g., a 3/8″ bit needs 1/8″ penetration per pass in steel. To install, unplug the machine, then loosen the chuck by turning the key counterclockwise in one slot. Insert the bit shank fully (at least 1/2″ deep), then tighten diagonally across all three slots. Critical mistake: leaving the chuck key in the chuck. A spinning key becomes a lethal missile—always remove it immediately after tightening.
Securing Your Workpiece for Zero Movement
Clamping isn’t optional—even a 1″ wood block can spin violently when a bit catches. Position the workpiece so the drill contact point is directly over solid table support, never cantilevered off the edge. For flat stock, use two C-clamps with protective wood pads to prevent marring. Round objects like pipes require a drill press vise with soft jaws. Test security by trying to wiggle the piece with gloved hands—zero movement is the only acceptable outcome. Pro tip: For thin metal, sandwich it between plywood sheets to prevent chatter and tear-out.
Configuring Speed and Depth Settings

Speed selection makes or breaks bit longevity. Small bits (under 1/8″) need 3,000+ RPM for wood but only 500 RPM for steel. Large bits (1/2″+) require slower speeds to avoid burning materials. Consult your machine’s speed chart—usually贴 inside the belt guard—and adjust by shifting belts between pulleys or using electronic dials. For depth control, loosen the depth stop collar, lower the quill until the bit touches your workpiece, then raise it 1/16″ and lock the collar. This prevents bit breakage when drilling through materials.
Executing the Perfect Drill Pass
Start by marking your hole center with a center punch—essential for metal to stop bit “walking.” Position the workpiece under the stationary bit, then power on the drill press. Wait 3 seconds for full RPM before engaging. Pull the feed handle smoothly toward you with consistent downward pressure—never force it. If smoke appears, you’re feeding too fast; if the bit chatters, you need more pressure. For deep metal holes, “peck drill”: advance 1/8″, retract to clear chips, repeat. When exiting the material, reduce pressure to avoid blowout splintering.
Peck Drilling Technique for Metal
- Lower bit until it contacts the center-punched mark
- Advance 1/8″ depth, then fully retract to clear chips
- Apply cutting oil to the bit tip before reinserting
- Repeat until reaching full depth
Skip this for wood under 1/2″ thick—continuous drilling works best
Handling Advanced Bits and Critical Safety Protocols

Forstner bits (flat-bottom holes) and hole saws demand extra caution. Set speeds 50% slower than twist bits and use firm, steady pressure—these bits grab aggressively if feed rate wavers. Always clamp oddly shaped workpieces in a vise; never hold them freehand. Non-negotiable rules: Unplug during bit changes, remove chuck keys before starting, and never wear gloves near the chuck. After drilling, wait 10 seconds for the bit to stop before clearing chips with a stiff brush—never your fingers.
Why Gloves Create Deadly Hazards
A spinning chuck can entangle glove fibers in 0.2 seconds, yanking your hand into the bit. OSHA data shows gloved operators account for 73% of drill press hand injuries. Your bare fingers provide tactile feedback about bit binding—gloves mask this warning until it’s too late.
Maximizing Precision and Machine Longevity
Extend your drill press’s life with two-minute habits. Wipe the column and table with a light oil after each use to prevent rust—never use WD-40 as it attracts dust. Clean chip buildup from the chuck threads monthly with a brass brush. For belt-driven models, check tension weekly; belts should deflect 1/4″ when pressed mid-span. Lubricate the quill shaft annually with machine oil to prevent binding during feeds.
Pro-level accuracy trick: Drill a test hole in scrap material first. If the bit wanders, your center punch was too shallow. If chips clog the flutes, reduce feed pressure by 20%. Consistent results come from diagnosing these micro-adjustments—not brute force. Store bits in a labeled rack to avoid dulling edges through contact.
Mastering how to operate a drill press starts with treating it as a system—not just a spinning bit. Every step from PPE selection to peck drilling depth affects your outcome. Commit these fundamentals to muscle memory through 5-10 practice holes in scrap material before tackling real projects. You’ll soon drill cleaner holes in half the time, with zero bit breakage. Remember: precision isn’t about the machine—it’s about the operator’s respect for the process. Now unplug that drill press, secure your workpiece, and make your first perfect hole today.
Final Note: Always unplug when not in use and store chuck keys in a designated spot—never on the machine. For ongoing learning, practice drilling overlapping holes to create custom mortises or use depth stops for consistent pocket screws. Your drill press is a gateway to professional craftsmanship; treat it right, and it will deliver decades of flawless service.


