
You’re in the middle of a project when you realize the chuck key is missing—again. That frustrating moment when your drill is useless because you can’t remove the current bit without the specialized key leaves most DIYers stranded. The good news: you don’t need the chuck key to loosen a drill bit. This guide reveals five practical methods to free a stuck drill bit when the key is nowhere to be found, using tools you likely already have in your workshop. Whether your chuck is seized from rust, over-tightened, or simply stubborn, these proven techniques will get your drill back in action without damaging your tool.
Essential Safety Steps Before Removing a Stuck Drill Bit
Before attempting any method to loosen your drill chuck, implement these critical safety measures. Always disconnect power sources first—unplug corded drills and remove batteries from cordless models to eliminate accidental activation risk. Put on ANSI-approved safety glasses to shield your eyes from potential metal fragments or debris during the process. Secure your drill properly by clamping it in a bench vise with padded jaws or having a partner firmly hold the drill body. This prevents dangerous spinning that could cause serious hand injuries. Work in a well-lit area where you can clearly see the chuck mechanism and potential problem areas.
What to Check Before Starting
Inspect your chuck for visible damage or unusual wear patterns that might indicate deeper issues. Look for cross-threading signs where the chuck doesn’t rotate smoothly or seems to bind at specific points. Check for rust buildup around the chuck base, especially if your drill has been stored in a humid environment. Determine whether you’re dealing with a standard keyed chuck (with three small holes around the collar) rather than a keyless model. This identification prevents you from using inappropriate techniques that could damage your specific chuck type.
Why Your Drill Chuck Won’t Release the Bit (And How to Diagnose)
Understanding why your chuck won’t loosen helps you select the right removal method. Most commonly, excessive force during previous tightening causes the chuck jaws to grip the bit too tightly, especially with cheaper drills that lack proper torque control. Rust and corrosion from moisture exposure can fuse metal components together, particularly in chucks stored in damp conditions. Debris buildup from drilling operations can jam the mechanism, preventing smooth rotation. In some cases, cross-threading from improper chuck key insertion damages the internal threads, making standard removal impossible.
Is It Really Stuck or Just Requires More Force?
Test whether your chuck is genuinely stuck or simply requires proper technique. Try rotating the chuck collar by hand—if it moves slightly but binds, you likely have a debris or rust issue. If it doesn’t move at all with hand pressure, it’s probably seized or over-tightened. Apply gentle pressure with two wrenches—if you feel smooth resistance throughout the rotation, the chuck is likely just tight. If resistance suddenly increases at specific points, you may have cross-threading or debris jamming the mechanism.
Method 1: The Two-Wrench Technique for Stubborn Chucks

This method works for 90% of stuck chuck situations and requires only basic tools found in most workshops. It mimics the chuck key’s function by applying opposing forces to different chuck components.
Step-by-Step Two-Wrench Execution
Gather two adjustable wrenches of similar size—10-inch adjustable wrenches work well for most standard drills. Position one wrench on the outer gear ring (the knurled collar with holes) and the second wrench on the inner chuck sleeve (the part that moves when tightening bits). Apply steady pressure in opposite directions—counterclockwise on the outer ring while holding the inner sleeve stationary. Use short, firm movements rather than continuous pressure for better results. If the chuck resists, apply penetrating oil around the base and wait 10 minutes before retrying.
Critical Safety Warning
Never point the chuck toward yourself or others during this process. If the bit suddenly releases, it could become a projectile. Keep your hands clear of the chuck jaws and maintain a firm grip on both wrenches to prevent slipping. Use gloves with good grip to protect your hands from metal burrs and wrench slippage.
Method 2: Hammer and Screwdriver to Break Free a Seized Chuck
When wrenches won’t budge your chuck, this impact-based method delivers the sudden force needed to break corrosion bonds or overcome extreme tightness.
Proper Screwdriver Technique for Maximum Effect
Select a sturdy flat-head screwdriver with a wide blade that fits snugly into one of the chuck’s gear teeth notches. Position the screwdriver so its handle angles toward counterclockwise rotation. Hold the screwdriver handle firmly with one hand while striking it with a hammer—use controlled, medium-force taps rather than full swings. Rotate the chuck 120 degrees after each tap and repeat the process in a different notch to distribute force evenly. For extremely stubborn chucks, apply penetrating oil between attempts and allow 5 minutes for it to work.
When to Avoid This Method
This technique risks damaging the chuck’s gear teeth, so reserve it for situations where other methods have failed. If your drill is high-end or vintage, consider professional help before attempting this method. Never use excessive force that could deform the chuck housing or damage internal mechanisms.
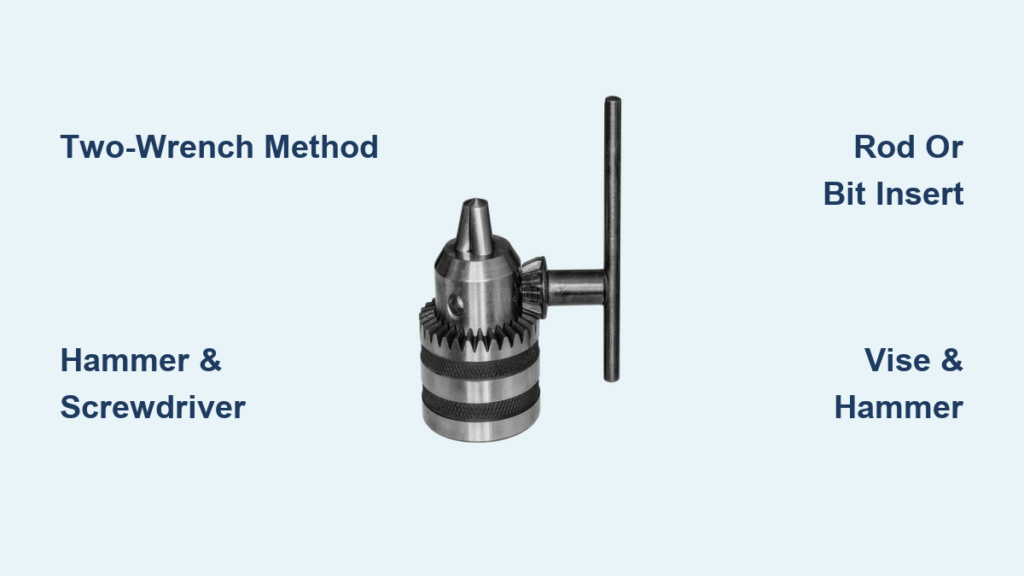
Method 3: Using a Rod or Spare Drill Bit When Wrenches Fail
This improvised approach creates instant leverage using common workshop items when specialized tools aren’t available.
Creating Instant Chuck Key Functionality
Find a rod, socket extension, or spare drill bit shank that fits snugly into one of the chuck’s keyholes. Insert it fully and grip the protruding end with locking pliers or an adjustable wrench. Position yourself so you can apply downward force while keeping your body clear of potential recoil. Apply steady counterclockwise pressure while holding the drill body firmly. For extra leverage, slip a short section of PVC pipe over the wrench handle.
Finding the Perfect Fit
The rod must fit tightly in the chuck hole—too loose and it will slip, too tight and you risk damaging the chuck. Test different sizes until you find one that requires firm insertion but doesn’t require hammering. A 3/16-inch diameter rod works for many standard 3/8-inch chucks, but verify fit before applying force.
Method 4: Vise-and-Screwdriver Method for Extreme Cases

When all else fails, this maximum-stability technique delivers controlled force to even the most seized chucks.
Securing Your Drill Properly
Clamp the drill body—not the chuck—in a bench vise with soft jaws or cloth padding to prevent damage. Position the drill so the chuck faces upward and is fully accessible. Insert a cold chisel or sturdy flat-head screwdriver into a chuck hole, angling it toward counterclockwise rotation. Use a dead-blow hammer for controlled strikes that minimize rebound. Tap firmly but don’t swing wildly—controlled impacts are more effective than brute force.
Why This Method Works Best for Rust-Seized Chucks
The vise provides absolute stability while the hammer delivers sudden force that breaks the static friction bond caused by rust. The combination of fixed position and impact energy overcomes the corrosion that hand tools can’t address. For severe cases, apply heat with a heat gun to the chuck area first (avoiding plastic components) to expand the metal before attempting removal.
Method 5: Two-Person Technique for Maximum Leverage
Sometimes you just need extra hands to generate the precise combination of forces required.
Coordinated Execution Steps
Person one firmly grips the drill body, bracing it against a stable surface while keeping fingers clear of moving parts. Person two positions wrenches or applies the screwdriver method. On the count of three, person one briefly triggers the drill for one second while person two simultaneously applies counterclockwise force to the chuck. The sudden internal torque combined with external force often breaks free even extremely tight chucks.
Critical Timing Considerations
The drill activation must be extremely brief—just enough to create internal movement without causing the chuck to spin freely. Practice the timing without applying chuck pressure first to coordinate the movements. Always wear eye protection during this method as bits can eject unexpectedly.
When to Stop Trying and Call a Professional
Recognize these warning signs that indicate it’s time to seek professional help. If you hear grinding noises during attempts, stop immediately—this suggests internal damage that worsens with continued force. Visible cracks in the chuck body mean continued pressure could cause catastrophic failure. If the chuck rotates but won’t open, you likely have stripped internal threads requiring replacement. For expensive or specialized drills, professional service often costs less than replacing a damaged tool.
Cost-Benefit Analysis of Professional Repair
Compare the cost of professional chuck replacement (typically $30-$75) against the value of your drill. Most quality drills justify professional service, while cheap hardware store models might be more economical to replace. Many local hardware stores offer basic chuck replacement services at reasonable rates—call ahead to check availability and pricing.
Preventing Future Chuck Key Emergencies
Secure your chuck key to your drill with a short lanyard or magnetic holder so it’s always available when needed. Keep a spare key in your main toolbox and consider purchasing a universal chuck key set that fits multiple drill sizes. Apply light machine oil to chuck threads monthly to prevent corrosion and seizing. Store your drill in a dry location with the chuck slightly open to reduce spring tension during storage.
Pro Tip: Upgrade to Keyless Convenience
For frequent bit changes, consider installing an aftermarket keyless chuck conversion kit—most standard drills accept these upgrades. Keyless chucks eliminate the frustration of lost keys while speeding up your workflow. Quality keyless chucks maintain the same holding power as keyed models but allow tool-free bit changes with one hand. This $20-$40 investment pays for itself in time saved and frustration avoided.


