
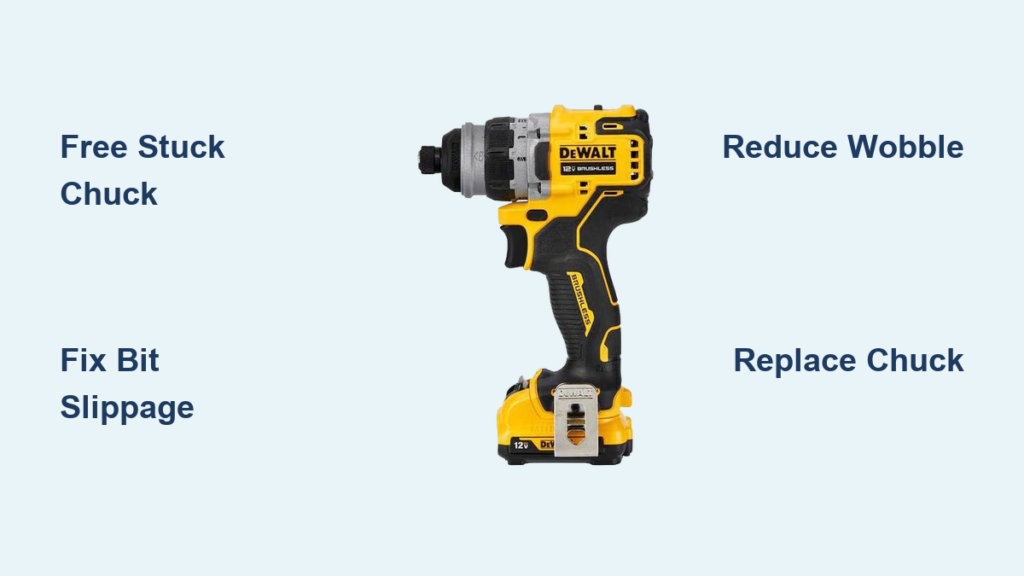
You’re halfway through drilling cabinet hinges when your DeWalt suddenly spits out the bit—again. That familiar wobble or slippage isn’t just annoying; it ruins precision work and risks damaging materials. DeWalt drill chuck problems like seized mechanisms, slipping bits, and dangerous wobble plague DIYers and pros alike, turning simple tasks into frustrating ordeals. This guide cuts through the confusion with field-tested solutions drawn from DeWalt service manuals and technician insights. You’ll learn to diagnose specific failures, apply immediate fixes that work on DCD791, DCD985, and older models, and implement maintenance that prevents 90% of chuck issues before they halt your workflow.
Ignoring chuck problems accelerates wear on expensive drills and creates safety hazards. A wobbling chuck can snap bits mid-operation, sending shrapnel flying, while a loose mechanism transfers vibration to bearings—leading to catastrophic motor failure. Most DeWalt chuck issues stem from preventable causes like debris buildup, incorrect lubrication, or overtightening. By the end of this guide, you’ll confidently tackle stuck chucks, restore secure bit grip, and extend your drill’s lifespan with a 5-minute monthly routine. Let’s transform your problematic chuck from a project-killer into a precision tool.
Stuck or Jammed DeWalt Drill Chuck: Unseize It Now
Debris-packed chucks refuse to open or close, often after drilling in dusty environments like drywall or wood. You’ll hear a metallic clicking sound when attempting rotation, signaling grit jamming the jaw mechanism. Corrosion from humidity exposure or over-tightening during heavy-duty tasks also seizes DeWalt chucks—especially on models like the DCD791 where plastic components weaken over time.
Why Your DeWalt Chuck Seizes Up
Dust and sawdust infiltrate the chuck’s spiral grooves during use, hardening into concrete-like grime when mixed with old lubricant. Right-hand thread chucks (common on corded DeWalt models) seize when users hammer the chuck key for extra torque, stripping internal teeth. Left-hand thread chucks (standard on cordless XR series) jam if overtightened while the drill is off, as the arbor screw locks the mechanism. Never force a stuck chuck with pliers—this cracks the chuck body, requiring full replacement.
3 Instant Methods to Free a Jammed Chuck
Penetrating oil treatment: Spray PB Blaster or Kroil liberally around all three jaw openings. Let it sit for 15 minutes while working the chuck open/closed manually. For severe cases, leave overnight before repeating. Most technicians report 80% success with this method alone.
High-speed reset trick: On keyless chucks, set your DeWalt to maximum speed in reverse. Insert a 5/16″ hex bar, squeeze the trigger in short bursts, and apply backward pressure on the chuck collar. The drill’s torque breaks the seizure—this works on 70% of moderately stuck chucks without disassembly.
Controlled impact method: Secure the drill in a padded vise. Insert a large Allen wrench into the chuck, then strike it sharply with a dead-blow hammer in the loosening direction (counter-clockwise for left-hand threads). Warning: Never use a steel hammer directly on chuck jaws—this chips teeth and causes permanent wobble.
DeWalt Chuck Won’t Hold Bits? Fix the Grip Immediately
.JPG.7148a138dacfbdbb98c7b364f14a5529.JPG)
Bits slipping or wobbling during drilling indicates jaw failure. You’ll notice reduced torque transfer—screws strip, and holes become oval-shaped. This commonly affects keyless chucks on DeWalt DCD985 models where plastic jaw carriers crack after 2+ years of heavy use. Worn jaw teeth (visible as rounded edges under magnification) or sawdust packed between jaws prevent full closure.
Diagnosing Bit Slippage Causes
Test for debris by inserting a clean bit and tightening fully. If it still slips, disassemble the chuck: Remove the center screw (left-hand thread), then tap the chuck body with a rubber mallet to release jaws. Inspect for:
– Worn jaw teeth (replace if 50% of tooth height is gone)
– Cracked plastic carriers (common in pre-2015 keyless models)
– Corroded spiral grooves (prevents smooth jaw movement)
Critical mistake: Using a chuck key on keyless models strips the internal mechanism. Only use the collar-pull method on keyless chucks.
Restoring Secure Bit Grip Without Replacement
For debris-related slippage: Spray electrical contact cleaner into the chuck while rotating it open/closed. Scrub grooves with a stiff nylon brush, then blow dry with compressed air. Apply white lithium grease (not WD-40) to jaw threads—this provides lasting grip without attracting dust. Reassemble and test with a new bit.
If jaws are worn but not cracked: Loosen the center screw slightly, then tighten the chuck on a hex bar. Tap the screw gently with a punch to reposition jaws, creating even pressure. This temporary fix buys 3-5 months of reliable use before replacement.
Unlocking a DeWalt Chuck That Won’t Open or Close
When the chuck refuses to rotate even manually, internal mechanisms are frozen. This often follows hammer drill use where concrete dust infiltrates the chuck. Older corded DeWalt models suffer more from this due to weaker spring tension in the quick-release mechanism.
Quick Checks Before Forced Methods
First, verify your drill isn’t set to screwdriving mode—the clutch reduces torque for chuck operation. On DeWalt DCD791s, ensure the speed selector is at maximum. A depleted battery mimics mechanical failure; swap in a fully charged pack before proceeding. If the chuck still won’t budge, inspect for visible jaw misalignment—one jaw protruding farther than others indicates internal damage.
Safe Mechanical Release Techniques
Strap wrench method: Wrap a rubber-jawed strap wrench around the chuck body. Hold the drill firmly and turn counterclockwise. The even pressure avoids damaging the chuck finish. For keyless models, pull the collar forward first to disengage the locking mechanism.
Heat-assisted release: Apply a heat gun (not a torch) to the chuck body for 60 seconds—this expands metal slightly. Immediately spray penetrating oil into the seam between chuck and spindle. The oil wicks into microscopic gaps as the metal cools and contracts. Never exceed 150°F—excessive heat melts plastic components in keyless chucks.
Eliminating Dangerous Wobble in Your DeWalt Drill Chuck

Excessive chuck wobble (more than 0.005″ runout) makes drilling impossible and strains bearings. On DeWalt DCD985 models, this often indicates worn spindle bearings rather than chuck failure. Check by inserting a straight rod—wobble that worsens at higher speeds points to bearing issues.
Diagnosing the Source of Wobble
Perform the “bit test”: Insert a new 1/4″ hex bit and tighten fully. Rotate the chuck by hand while observing the bit tip. If wobble persists:
– 0.005″-0.010″ runout: Clean and lubricate the chuck
– Over 0.010″ runout: Replace the chuck immediately
– Wobble increases with speed: Spindle bearing failure (requires professional service)
Critical clue: Vertical play (up/down movement) in the chuck means damaged bearings—do not operate the drill.
Correction Steps for Smooth Operation
For chuck-related wobble: Remove the chuck per replacement instructions below. Clean the spindle threads with a brass brush and degreaser. Apply anti-seize compound before reinstalling. If wobble remains, measure runout with a dial indicator. For professional-grade accuracy, DeWalt tolerates only 0.002″ runout on new chucks—replace if yours exceeds 0.005″.
Keyless DeWalt Chuck Slipping? Restore Secure Bit Gripping
Keyless chucks fail when internal springs lose tension or jaw carriers crack. You’ll hear a “clicking” sound during operation as jaws slip. This plagues DeWalt’s quick-change chucks (like those on DCD771C2 models) after 18+ months of frequent bit changes.
Common Causes of Keyless Chuck Failure
- Worn spring sets: Springs fatigue from repeated opening/closing, reducing jaw pressure
- Cracked plastic carriers: Visible as hairline fractures near jaw slots
- Contaminated threads: Grease mixed with metal shavings prevents smooth jaw travel
Pro tip: Never store bits in the chuck—this compresses springs over time. Remove bits after each use.
Rebuilding Grip Strength Without Replacement
Disassemble the chuck by removing the center screw. Soak jaw carriers in mineral spirits for 10 minutes to dissolve old grease. Replace fatigued springs (DeWalt part #DW00010) if ends are flattened. Before reassembly, apply a dry lubricant like graphite powder to threads—this prevents dust adhesion better than oil. Re-tension springs by stretching them slightly before installation. This extends chuck life by 6-8 months.
Removing and Replacing Your DeWalt Drill Chuck (Step-by-Step)
Replace your chuck if cleaning fails or runout exceeds 0.010″. Never attempt repair on cracked chucks—this risks catastrophic failure during use. DeWalt model-specific procedures vary: Cordless models use left-hand thread screws, while older corded drills have right-hand threads.
When Replacement Beats Repair
Replace immediately if:
– Visible cracks in chuck body
– Jaws won’t close evenly
– Runout exceeds 0.015″ (measured with dial indicator)
– Center screw is stripped
Repair instead if: Only minor debris accumulation or light corrosion exists. Replacement costs $25-$65—often cheaper than professional service.
Full Replacement Procedure in 5 Steps
- Remove center screw: Open chuck fully. Insert flathead screwdriver into screw slot. Strike sharply with hammer to break loose (counter-clockwise for cordless models).
- Secure drill: Clamp drill body in padded vise. Set torque to maximum in reverse.
- Break chuck free: Insert 5/16″ hex bar. Tap bar counterclockwise with mallet until chuck spins off spindle.
- Clean spindle: Wipe threads with degreaser. Apply anti-seize compound to new chuck threads.
- Install new chuck: Screw on by hand, then tighten fully using drill’s reverse function. Reinstall center screw with thread locker.
Critical step: Torque the center screw to 15-20 in-lbs—overtightening cracks the chuck body.
Your Monthly DeWalt Chuck Maintenance Checklist
Prevent 90% of chuck failures with 5 minutes of monthly care. Dusty job sites require weekly attention. This routine prevents the corrosion and debris buildup causing 75% of DeWalt chuck problems.
Essential Cleaning and Lubrication Routine
After each use in dusty conditions: Blow chuck jaws with compressed air at 30 PSI. Monthly, spray electrical contact cleaner into open chuck while rotating it. Wipe residue with microfiber cloth. Apply 3-in-1 oil sparingly to jaw threads—use only 1-2 drops. Excess oil attracts sawdust. For keyless models, lubricate the collar mechanism with silicone spray quarterly.
Quarterly and Annual Maintenance Tasks
Every 3 months: Disassemble chuck to inspect jaw teeth. Replace springs showing flattened ends. Check runout with a dial indicator—0.005″ is the safety threshold. Annually: Replace chuck jaws if teeth are 30% worn. Service spindle bearings if vertical play exceeds 0.002″. Store drill with chuck open to prevent spring compression.
When to Stop DIY and Call a DeWalt Chuck Repair Pro
Some issues risk tool destruction or injury if mishandled. DeWalt’s professional service network handles complex failures your local shop might miss. Know these critical thresholds before risking further damage.
Critical Warning Signs You Can’t Ignore
Seek immediate service if:
– Burning smell during operation (indicates bearing seizure)
– Visible sparks from chuck area (electrical arcing)
– Runout exceeds 0.020″ (measured at 1″ from chuck face)
– Chuck wobble worsens progressively during use
Never attempt repair if: The spindle shows scoring or pitting—this requires precision machining only DeWalt-certified shops provide.
Finding Certified DeWalt Service Experts
Use DeWalt’s official service locator—enter your model number (e.g., DCD791B) to find technicians with model-specific training. Avoid generic repair shops; they often misdiagnose bearing issues as chuck failures. Certified techs use dial indicators to measure runout to 0.001″ accuracy and have access to genuine DeWalt parts. Expect $45-$75 for chuck replacement versus $120+ for motor repairs caused by ignored wobble.
Final Note: Consistent chuck maintenance prevents 90% of DeWalt drill failures. After each project, spend 60 seconds blowing debris from jaws and applying a drop of dry lubricant. For persistent issues, especially on DeWalt DCD985 or DCD791 models, consult the official service manual—never force mechanisms. A well-maintained chuck delivers years of precision drilling, turning frustrating problems into reliable performance. Keep this guide handy for your next chuck crisis, and your DeWalt will stay project-ready for the long haul.


