
That pristine wood stock on your heirloom rifle? Drilling for sling swivels could slash its value by 30% overnight. For collectors and hunters alike, preserving original finishes while securing your firearm during transport is non-negotiable. This guide reveals exactly how to make a no drill rifle sling using proven techniques that work on any rifle—from vintage lever-actions to modern hunting rifles—without a single permanent modification. You’ll master friction-based attachment systems using common materials, avoid costly gunsmith fees, and carry your rifle confidently knowing you’ve protected its integrity. Whether you’re heading to the range or deep into the backcountry, these methods deliver military-grade security while keeping your firearm 100% reversible and unaltered.
Why Drilling Holes Ruins Your Rifle’s Value (And What to Do Instead)
Permanently modifying a classic rifle’s stock turns a potential investment into a compromised asset. Firearms appraisers consistently penalize drilled stocks—especially on collectibles like Browning BLRs or military surplus rifles—by 25-40% due to irreversible finish damage and structural concerns. Even on modern rifles, unnecessary drilling creates stress points that can lead to cracks over time. The solution? Embrace mechanical attachment systems that leverage friction and tension. These methods exploit the stock’s natural contours: the narrow “neck” just ahead of the buttplate and the tapered forend near the barrel. By wrapping straps or cordage around these high-friction zones, you create secure anchor points that tighten under load but release instantly when needed. Crucially, this approach lets you test multiple sling configurations before committing to permanent hardware, making it ideal for trial hunting trips or range days.
Critical Safety Steps Before Attaching Your No-Drill Sling
Never skip this phase—your life depends on it. Before handling tools or materials, verify your rifle is 100% unloaded: remove the magazine, cycle the action three times, and visually inspect the chamber with a flashlight. Point the muzzle in a safe direction throughout installation. Lay the rifle on a non-slip surface like a rubber mat—not carpet or fabric that could snag triggers. When positioning straps or loops, maintain a 2-inch clearance from the muzzle, bolt handle, and safety mechanism. Critical warning: Any material wrapped around the barrel must sit behind the front sight base to prevent obstructing gas flow or barrel harmonics. For lever-actions, ensure loops don’t interfere with the loading gate. Always treat the firearm as loaded during the entire process, keeping your finger outside the trigger guard until ready to shoot.
3 Proven Methods to Attach a No-Drill Sling Without Tools
Forget expensive clamps or gunsmith visits—these field-expedient techniques work with gear you likely own. Each method exploits the stock’s natural taper to create self-tightening anchor points that won’t slip during movement. All solutions maintain full access to controls and function flawlessly with standard two-point slings.
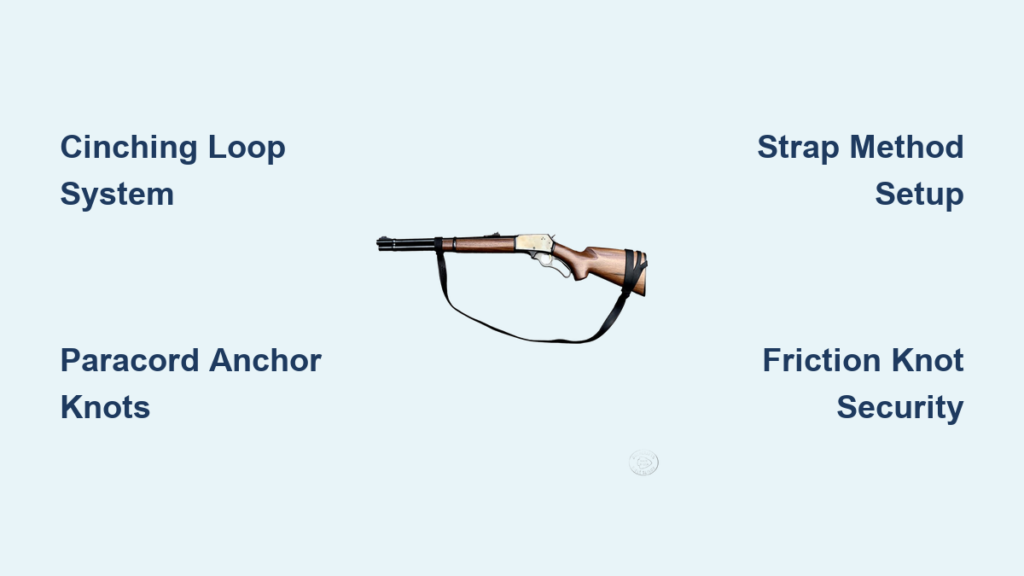
Build a Cinching Loop System That Won’t Slip in 90 Seconds
This friction-based method uses a single strap to create instant anchor points at both ends of your rifle. You’ll need one 48-inch length of 1.5-inch nylon webbing (or heavy paracord).
- Position the strap: Lay the webbing flat across the rifle’s forend, centered just behind the front sight. Pull equal lengths toward the muzzle and action.
- Create the cinch: Cross the ends over the top of the stock, then pass them under the barrel channel. Feed both ends through the loop formed at the stock’s base, pulling firmly against the wood.
- Lock the tension: Repeat the under-and-through motion once more. This double-wrap creates a trucker’s hitch effect—any downward force tightens the grip.
- Secure the sling: Attach your sling’s front swivel to the top loop. The system self-tightens when bearing weight but releases with a single tug on the loose ends. Pro tip: Add rubber shelf liner tape to the strap’s inner surface for 300% more grip on slick synthetic stocks.
Create a $5 Paracord Rifle Sling in 20 Minutes (Step-by-Step)

When commercial kits fail, this survival-style sling handles 250+ lbs of tension. You need 50 feet of 550 paracord, two D-rings, and a lighter.
- Forge the front anchor: Cut a 6-foot cord section. Melt one end, thread it through a D-ring, and tie a double fisherman’s knot 4 inches from the ring. Wrap tightly around the forend’s narrowest point (just ahead of the front swivel stud), then tie the other end to the D-ring with a constrictor knot. Trim and melt excess.
- Build the rear anchor: Repeat with another 6-foot section on the stock’s neck (1 inch forward of the buttplate). Ensure both anchors sit perpendicular to the stock.
- Weave the sling body: Find the midpoint of your remaining cord. Create a 4-inch shoulder pad by cobra-weaving the strands for 10 inches. Extend the weave to your desired length (typically 40 inches).
- Connect and test: Lark’s head both ends through the D-rings. Melt all knots. Critical check: Suspend the rifle by the sling—anchors shouldn’t rotate or slip more than 1/8 inch under full weight.
Attach a No-Drill Sling in 4 Minutes: The Strap Method
For instant deployment, use this military-inspired technique with two 24-inch webbing straps (available at camping stores).
- Wrap the forend: Position Strap A horizontally around the stock 2 inches behind the front sight. Cross the ends over the top, thread both through the strap’s built-in slit, and pull tight until snug against the wood grain.
- Secure the buttstock: Place Strap B around the stock’s neck. Cross ends over the comb, thread through its slit, and tighten to finger-tight pressure—never overtighten and crack wood.
- Link the sling: Clip your two-point sling’s front swivel to Strap A’s top loop and the rear swivel to Strap B’s loop.
- Test for security: Lift the rifle vertically by the sling. Straps should resist rotation and show zero slippage. Warning: On tapered stocks, add a half-hitch around the strap ends to prevent “creep” during carry.
Securing Your Sling Without Swivels Using Friction Knots
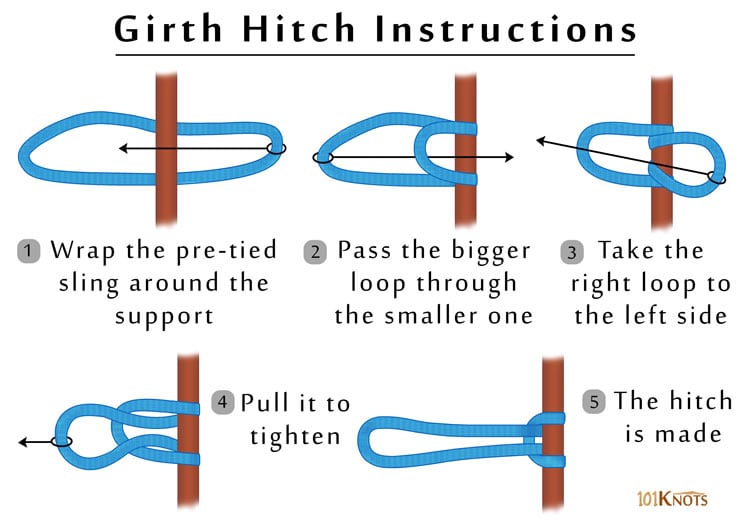
Missing factory swivels? The girth hitch method creates instant anchor points using only your sling strap. Ideal for muzzleloaders or smooth-bore shotguns:
- Form a 6-inch loop at one end of your sling strap using a bowline knot.
- Pass this loop around the barrel behind the front sight.
- Feed the strap’s working end through the loop, creating a noose.
- Pull tight until the strap grips the barrel channel firmly.
Key insight: This knot tightens under load but releases instantly when slackened—perfect for quick transitions. For critical applications, back it with a slip knot that won’t loosen accidentally.
5-Minute Maintenance Checks for Your No-Drill Sling

Before every hunt, perform these critical inspections to prevent failures:
- Inspect strap integrity: Check for fraying at contact points with wood grain (common on forend straps). Replace if fibers are separated.
- Test anchor security: Lift the rifle by each sling point—anchors should show zero slippage. On wood stocks, verify no compression marks indicate overtightening.
- Clean contact zones: Wipe straps with isopropyl alcohol to remove dirt that reduces friction. For paracord, soak in warm water to remove embedded debris.
- Check knot tension: On cinch loops, ensure constrictor knots haven’t loosened. Retighten if you can slide the strap with thumb pressure.
- Season wood stocks: Apply boiled linseed oil quarterly to prevent drying cracks where straps contact the stock.
The 3-Point Safety Check Before Carrying Your Rifle
Never skip these tests—your safety depends on it:
- Function test: With the rifle unloaded and action open, shoulder it while wearing the sling. Verify the safety, bolt, and trigger operate smoothly with zero strap interference.
- Stress test: Hang the rifle vertically by the sling for 30 seconds. Anchors must show no rotation or slippage exceeding 1/16 inch.
- Emergency release test: Simulate a snag by applying sudden downward force. The system should hold securely, but release instantly when you pull the slack ends.
If any test fails, dismount and reposition your sling—never compromise on security. Remember: A properly installed no-drill sling should feel like a permanent fixture yet vanish without a trace in minutes. By mastering these techniques, you’ve unlocked the ability to carry any rifle confidently while preserving its legacy. For vintage firearms, always photograph your attachment points before removal as proof of non-modification. Now grab your gear and hit the trail—your rifle’s value and your safety are protected.


