
Struggling with a tile project but your drill failed or you’re working in a location without power? Knowing how to mix thinset without a drill is an essential skill that keeps your tiling project moving forward. Thinset—the cement-based mortar that bonds tile to surfaces—requires proper mixing to achieve that crucial “peanut butter” consistency for maximum adhesion. While professionals often reach for power tools, hand-mixing delivers superior control and prevents costly mistakes like over-mixing that can ruin your batch. Whether you’re tackling a small backsplash repair or a full bathroom renovation, this guide reveals exactly how to mix perfect thinset by hand, complete with professional techniques for achieving flawless results every time.
The good news is that mixing thinset without a drill isn’t just a backup plan—it’s often the superior approach for smaller jobs. Without the risk of overheating your drill or introducing too much air into the mixture, you gain tactile feedback that helps you nail the perfect consistency. Many experienced tilers actually prefer hand-mixing for batches under 3 gallons because it allows them to feel when the thinset has reached optimal hydration. This guide walks you through every critical step, from selecting the right mixing tools to adjusting consistency like a pro, ensuring your tile installation has the rock-solid foundation it needs to last for decades.
Why Hand-Mixing Beats Power Tools for Small Jobs
Hand-mixing thinset offers surprising advantages over power tools, especially for projects under 3 gallons. Cordless drills frequently overheat when mixing thinset due to the extreme torque demands of the thick mortar—lower voltage models (12V-14.4V) often fail completely after just one batch. Even heavy-duty drills risk damaging motor windings from continuous operation under this heavy load. When you mix by hand, you eliminate these risks entirely while gaining precise control over consistency. You can feel when the mixture reaches that perfect “peanut butter” texture that’s thick enough to hold a notch but still spreadable. This tactile feedback prevents common mistakes like adding too much water—a critical error that weakens the final bond by up to 30%.
The Hidden Dangers of Drill Mixing
Power tools introduce specific risks that hand-mixing avoids. Thinset’s high viscosity places extreme demands on drill motors, often causing them to overheat within minutes. You’ll notice this through excessive heat, burning smells, or sudden performance drops. Cordless drills are particularly vulnerable—their batteries can’t sustain the high current draw required for proper thinset mixing, leading to premature failure. Even with a heavy-duty drill, improper paddle selection (like using a paint mixer instead of a dual-blade paddle) creates uneven mixing that leaves dry pockets in your mortar. Hand-mixing eliminates these equipment risks while giving you complete control over the hydration process.
Essential Hand-Mixing Tools You Already Own
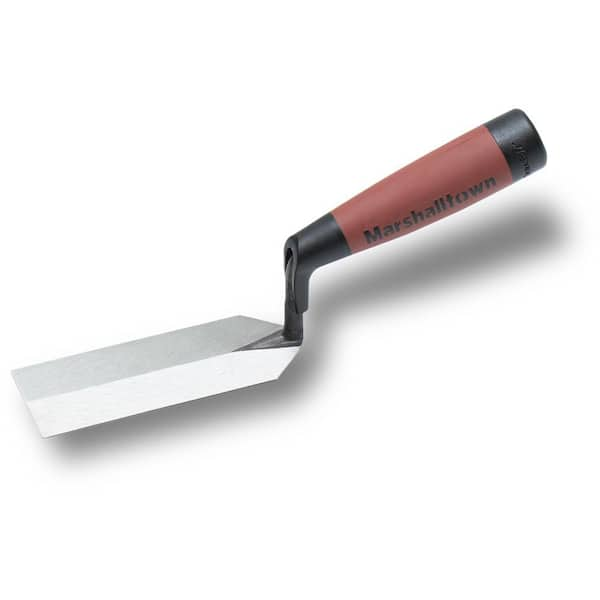
Forget expensive specialty tools—you likely have everything needed to mix perfect thinset without a drill. For small to medium batches (1-3 gallons), a heavy-duty margin trowel is your most versatile tool, allowing precise control as you scrape the bucket’s sides and bottom. Masons’ hoes work better for full 5-gallon batches, pulling material from the center to the edges with each stroke. Before you begin, gather these essentials:
- A clean 5-gallon bucket (dampen the interior first to prevent sticking)
- Measuring containers for accurate water-to-powder ratios
- A small bucket of clean water and sponge for immediate cleanup
- Nitrile gloves, safety glasses, and an N95 respirator for protection
Why Bucket Choice Matters
The right bucket makes hand-mixing significantly easier. Opt for a standard 5-gallon contractor bucket with volume markings—these provide visual cues for measuring both liquid and powder. Avoid flimsy plastic buckets that flex during vigorous mixing; rigid contractor-grade buckets maintain their shape, allowing you to scrape effectively. For small repairs, use a smaller bucket that matches your batch size—mixing in too large a container makes it difficult to reach the bottom consistently. Always lightly dampen the bucket’s interior before adding materials; this prevents the first layer of thinset from bonding permanently to the plastic.
Perfect Hand-Mixing Technique: Step-by-Step
Start with the Right Liquid-to-Powder Ratio
Begin by measuring your liquid precisely—typically 4-5 quarts of cool, clean water per 50 lb bag of unmodified thinset. Pour this into your dampened bucket first, as adding liquid to powder creates “fish eyes” (dry clumps that won’t incorporate). For modified thinsets requiring latex additive, follow the manufacturer’s specific ratio (usually 5-6 quarts per bag). Never guess these measurements—too much water weakens the bond, while too little creates an unworkable mixture. Use cool water (not cold) as it extends your working time compared to warm water.
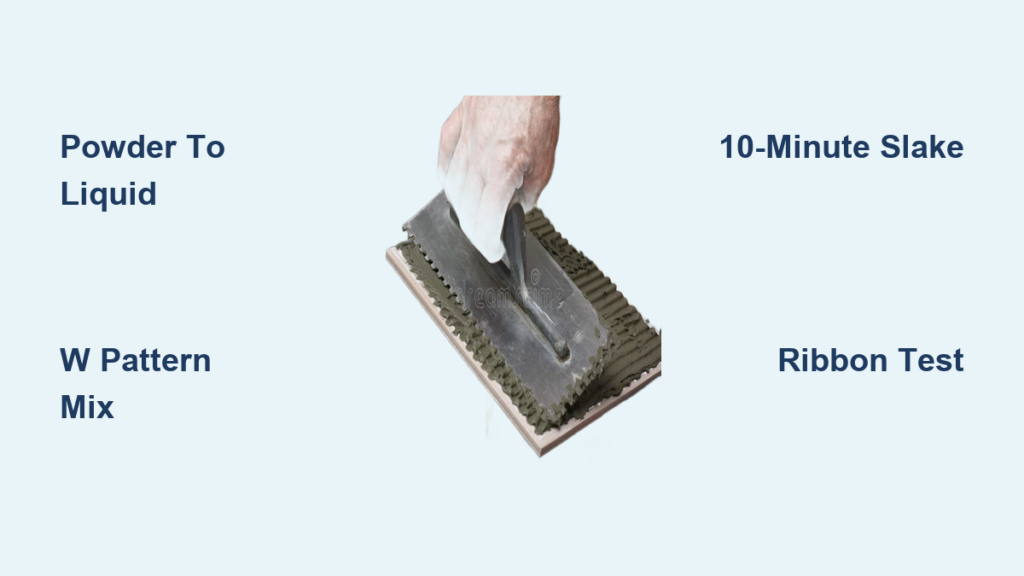
The Critical “Powder to Liquid” Method
This is where most DIYers fail: always add powder to liquid, not the reverse. Start by sifting about one-third of your thinset powder into the liquid while stirring constantly with your margin trowel. Use a “W” pattern—scrape from bottom to top, sides to center—folding the mixture over itself with each stroke. After incorporating the first third, pause to check for dry pockets along the bucket’s sides and bottom. Continue adding powder in small increments while mixing, never dumping large amounts at once. This gradual incorporation prevents lumps and ensures complete hydration.
Achieving Professional-Grade Consistency
The target consistency should resemble smooth peanut butter—not too runny, not too stiff. After incorporating all powder, mix vigorously for 5-10 minutes, scraping thoroughly. Stop to check consistency: scoop some on your trowel held at a 45-degree angle—it should slide slowly but hold its shape. If it runs immediately, it’s too thin; if it won’t budge, it’s too thick. Remember the golden rule: add water in 2-ounce increments if adjusting thinset that’s too thick, but avoid adding powder to thin mixtures as this disrupts the chemical balance. After initial mixing, let the thinset slake (rest) for 10 minutes—this crucial step allows full hydration before your final mix.
Avoid These Costly Hand-Mixing Mistakes

The “All Powder at Once” Disaster
Dumping the entire bag into the liquid creates unmixable lumps that weaken your final bond. Always add powder gradually while stirring. If you do create lumps, keep mixing—don’t try to break them apart with your trowel as this introduces air pockets. Proper technique prevents lumps from forming in the first place.
Skipping the Slake Time
That 10-minute rest period isn’t optional. Slaking allows cement particles to fully hydrate, activating the bonding chemicals. Skipping this step results in thinset that sets too quickly or fails to achieve maximum strength. Use this time to prepare your work area—lay out tiles, clean the substrate, or organize tools.
Over-Mixing After Slaking
Once you’ve completed the slake period, mix for just 1-2 minutes during the final incorporation. Over-mixing introduces excess air that creates microscopic voids in the cured thinset, reducing bond strength. Your final mix should be smooth and homogeneous—not frothy or aerated.
Pro Tips for Flawless Hand-Mixed Thinset
Temperature Control Secrets
Thinset performs best between 50-100°F (10-38°C). In hot weather, use cool water and work in the shade to extend your pot life. For cold conditions, warm your water slightly (never exceed 70°F/21°C) to improve workability. Store your thinset powder off concrete floors in a dry location—moisture compromises its effectiveness before you even start mixing.
Small-Batch Strategy for Large Projects
For installations over 50 square feet, mix multiple small batches rather than one large one. Thinset begins curing chemically after mixing, so a 3-gallon batch gives you ample working time (about 2 hours) before it starts setting up. Mark each bucket with the mix time—this prevents using partially set material that won’t bond properly.
The Ribbon Test: Your Consistency Gauge
Professional tilers use the ribbon test to verify perfect consistency: lift your mixing tool and let thinset drip back into the bucket. It should form a ribbon that holds its shape for 1-2 seconds before breaking. If it falls apart immediately, it’s too thin; if it doesn’t drip at all, it’s too thick. This simple test beats guessing every time.
Cleanup Protocol: Save Your Tools
Never let thinset dry on your tools—it becomes nearly impossible to remove. Immediately after mixing, scrape excess mortar back into the bucket (if still usable), then submerge tools in your clean water bucket. Work the mixture off with a stiff brush while it’s still wet. For buckets, fill with water and let soak briefly before scrubbing—dried thinset can be removed with vinegar for stubborn residue. Remember: never pour thinset down drains as it will harden and cause clogs.
Final Note: By mastering how to mix thinset without a drill, you’ve gained a valuable skill that ensures your tiling projects succeed regardless of equipment limitations. The tactile control of hand-mixing often produces superior results to power tools for small to medium jobs, giving you confidence in every tile installation. Remember the critical steps: add powder to liquid gradually, mix using the “W” pattern, allow proper slake time, and verify consistency with the ribbon test. With these techniques, you’ll create perfectly mixed thinset that delivers maximum bond strength and professional results—no drill required.


