
Ever tried drilling a hole where your elbow keeps hitting the wall? That frustrating moment when your standard drill simply won’t fit in the cramped space behind your kitchen cabinet or under the dashboard of your car is all too common. Drilling in tight spaces transforms what should be a simple task into a test of patience and creativity. Whether you’re installing under-cabinet lighting with only 3 inches of clearance or running wiring through finished walls, the right approach makes all the difference. This guide delivers exactly what you need to know about how to use drill in tight space situations—no guesswork, no frustration, just proven solutions that work when space is measured in inches rather than feet.
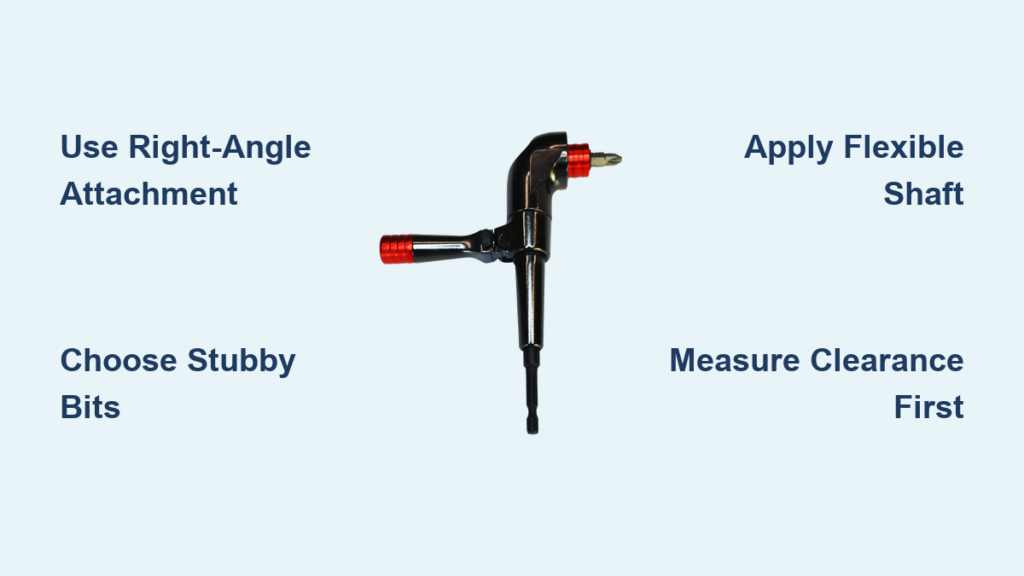
Right-Angle Drill Attachments That Solve Clearance Problems
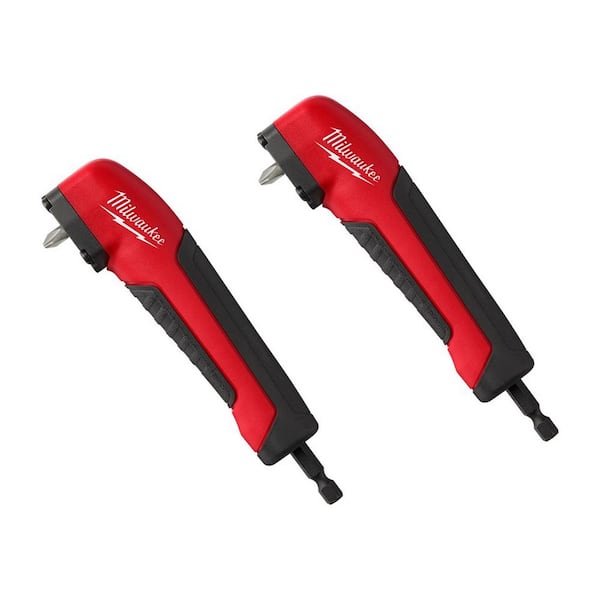
When your workspace won’t accommodate a standard drill, right-angle attachments convert your existing tool into a space-saving powerhouse. The Milwaukee SHOCKWAVE Bit Holder (Model 48-32-2390) and similar products redirect your drill’s torque at a 90-degree angle, letting you work in spaces as narrow as 4 inches. These adapters typically feature a ¼-inch hex drive system that accepts various hex-shank bits, making them versatile for multiple projects.
Why Right-Angle Drills Outperform Standard Models in Confined Areas
Dedicated right-angle drills like the Dewalt DCD740 or Milwaukee 12V models offer superior control compared to attachments. Their compact design positions the motor parallel to your work surface rather than perpendicular, eliminating the bulk that prevents standard drills from fitting. Professional electricians swear by these tools when running Romex through wall studs without creating large drywall openings. One critical tip: brace yourself against the wall when using right-angle tools, as binding bits can cause sudden torque reactions that send the drill twisting in your hands.
Choosing Between Attachments and Standalone Right-Angle Drills
For occasional DIY projects, a right-angle attachment (typically $15-$50) provides excellent value by converting your existing drill. However, if you regularly work in tight spaces—like electricians running wires or automotive technicians accessing engine compartments—a dedicated right-angle drill ($150-$300) delivers better balance and control. Both options require hex-shank bits, so invest in stubby brad point bits for woodworking applications where precision matters most.
Flexible Shaft Systems for Impossible Angles
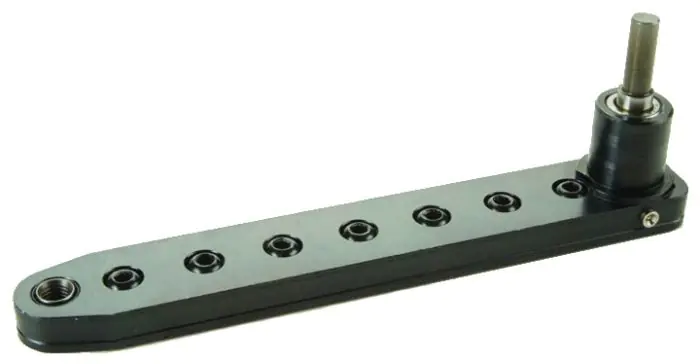
When your tight space requires navigating around corners or through winding paths, flexible shaft adapters become indispensable. The RYOBI 11-inch Flexible Shaft Bit Holder (Model A10FB1G) and similar products feature a cable-like shaft that bends to reach areas rigid tools can’t access. This is your solution for those “how on earth am I supposed to get in there?” moments, like adding wiring inside a finished cabinet or repairing vintage furniture.
Mastering Control with Flexible Drilling Tools
Flexible shaft systems transmit less torque than rigid tools, making them ideal for softwoods and non-ferrous metals but less effective for dense hardwoods or steel. Start with smaller pilot holes (1/8″ or less) to establish your path before progressing to larger bits. Remember—these tools have torque limitations (typically 35 in-lbs maximum), so never use them with impact drivers as the excessive force will damage the flexible mechanism. For furniture restoration on pieces like vintage oak rocking chairs, pair your flexible shaft with stubby brad point bits to maintain precision in tight corners.
Stubby Bits and Extended Length Solutions
Sometimes the simplest solution involves changing your drill bit rather than your entire tool. Stubby drill bits (typically 2-3 inches long) fit where standard bits can’t, perfect for shallow spaces like cabinet toe-kicks or between wall studs. For deep but narrow cavities, extended-length bits (12-24 inches) let your drill body remain outside the confined area while the bit reaches the work surface.
When to Use Aircraft-Length Bits for Deep Access
Aircraft-length bits (12-18 inches) solve the classic problem of drilling through multiple wall studs or floor joists without removing drywall. For electrical work, use extended auger bits to create clean pathways for Romex wiring through wall cavities. In historic home renovations involving 12-inch solid timber beams, professionals employ step-drilling techniques—starting with a 1/8″ pilot hole and gradually increasing size—to prevent tear-out while maintaining accuracy. Always mark your desired depth with tape on the bit to avoid drilling too far into sensitive areas.
Drilling Inside Kitchen Cabinets Without Removing Doors
Kitchen cabinet interiors present some of the most common tight-space challenges, with clearance often limited to 3-4 inches. Installing under-cabinet lighting or plumbing fixtures requires specialized approaches that won’t damage your cabinetry.
The 3-Step Process for Cabinet Interior Drilling
First, measure your exact clearance with a ruler—this determines whether you need a right-angle attachment, flexible shaft, or simply stubby bits. For most lighting installations, a right-angle attachment with 1/8″ pilot bits works perfectly. Start each hole with a center punch to prevent bit walking, then drill at low speed with steady pressure. If you’re working near finished surfaces, place a backing board behind your drilling point to prevent tear-out on the exit side. Many professionals use the “back drill” method for cabinet installations: pre-drill a guide hole from the accessible side, then complete the hole from the tight side using your flexible extension.
Automotive Repair: Drilling in Engine Compartments
Working on cars introduces unique tight-space challenges where clearance might be just 2-3 inches around critical components. Whether you’re repairing steering columns, accessing brake components, or running new wiring, the right technique prevents costly mistakes.
Essential Tools for Automotive Tight-Space Drilling
For most engine compartment work, a pancake-style drill (less than 2 inches thick) or right-angle attachment provides the necessary clearance. When drilling near fuel lines or electrical components, use non-sparking tools and ensure your workspace is well-ventilated. A critical safety tip: always disconnect the battery before drilling near any electrical system to prevent short circuits. For stubborn applications like catalytic converter access, flexible shaft systems navigate around exhaust components where rigid tools cannot fit.
Step-by-Step Guide to Successful Tight-Space Drilling

Measure Clearance Before Selecting Your Tool
Use calipers or a ruler to measure the exact space available—this determines whether you need a right-angle attachment, flexible shaft, or simply stubby bits. Don’t guess; precise measurements prevent tool damage and failed attempts. If you have less than 3 inches of clearance, focus on stubby bits or flexible shaft systems rather than trying to force a right-angle tool.
Secure Your Workpiece and Mark Precisely
In tight spaces, a wobbly workpiece becomes dangerous. Clamp materials securely or use a second pair of hands. Mark your hole location with a center punch to create a divot that prevents bit walking—this is crucial when you can’t see your work clearly. For deep holes, apply cutting oil to metal surfaces to reduce heat and extend bit life, clearing chips frequently to prevent binding.
Control Bit Binding with Proper Technique
When bits bind in dense materials, they can suddenly twist your tool. Brace yourself against a stable surface, use two hands when possible, and maintain consistent low pressure. If you feel resistance, back the bit out to clear debris before continuing. For hardwoods, pre-drill with a 1/8″ bit before progressing to your final size—this prevents tear-out and reduces binding risk.
Critical Safety Gear for Confined Space Drilling
Always wear ANSI Z87.1 safety glasses in tight spaces—debris has nowhere to go but back at you. Add a face shield for overhead drilling where gravity works against you. Cut-resistant gloves protect your hands when working in cramped quarters where fingers might slip near the bit. For extended work in enclosed spaces, use hearing protection rated NRR 25dB+ and an N95 respirator to avoid inhaling fine dust particles. Ensure your workspace has adequate lighting—many professionals use headlamps with magnetic bases that attach to metal surfaces near their work area.
Preventing Common Tight-Space Drilling Mistakes
Why Bit Walking Ruins Tight-Space Projects
Bit walking occurs when your drill bit skids across the surface instead of penetrating cleanly—this is especially problematic when you can’t see your work clearly. Prevent it by using a center punch to create a definitive starting point, beginning with a smaller pilot bit, and maintaining perpendicular pressure to the surface. For curved surfaces like automotive components, create a flat landing spot with sandpaper before drilling.
Managing Heat Buildup in Confined Areas
Overheating bits lose temper and effectiveness quickly in tight spaces where heat can’t dissipate. Drill in short bursts (10-15 seconds), then allow the bit to cool. For metal work, use cutting oil liberally and let the bit do the work rather than forcing it. If you smell burning or see discoloration on the bit, stop immediately and let it cool—continuing will ruin both the bit and your workpiece.
Conclusion
Mastering how to use drill in tight space situations transforms frustrating obstacles into routine tasks. The right combination of specialized tools—whether a $20 right-angle attachment or a professional-grade flexible shaft system—paired with proper technique ensures success where standard drills fail. Remember to measure your clearance first, select the appropriate tool for your specific constraints, and prioritize safety with proper gear and technique. With these proven methods, you’ll confidently tackle any tight-space drilling challenge, from installing under-cabinet lighting to automotive repairs, without damaging your work or compromising safety. The next time you face that impossible angle, you’ll know exactly which tool to reach for and how to use it effectively.


