
Your power drill sits unused in the toolbox while you struggle with hand screws and manual holes—a frustrating reality for 68% of new DIYers. But mastering this essential tool transforms weekend projects from daunting chores into satisfying achievements. Whether you’re assembling furniture, mounting shelves, or building a deck, knowing how to use a power drill properly saves hours of effort and prevents costly mistakes. This guide cuts through the confusion with actionable techniques straight from professional workshops. You’ll learn to select bits confidently, avoid dangerous slips, and achieve clean results on wood, metal, and concrete—no prior experience needed.
The secret isn’t brute force—it’s precision. A dull bit or incorrect torque setting can splinter wood, strip screw heads, or even cause injury. Yet with the right approach, your drill becomes an extension of your hand. In the next few minutes, you’ll gain the exact steps to drill pilot holes without wandering, drive screws flush every time, and tackle masonry safely. Forget confusing jargon; we focus only on what matters for your next project. Let’s turn that intimidating tool into your most trusted workshop ally.
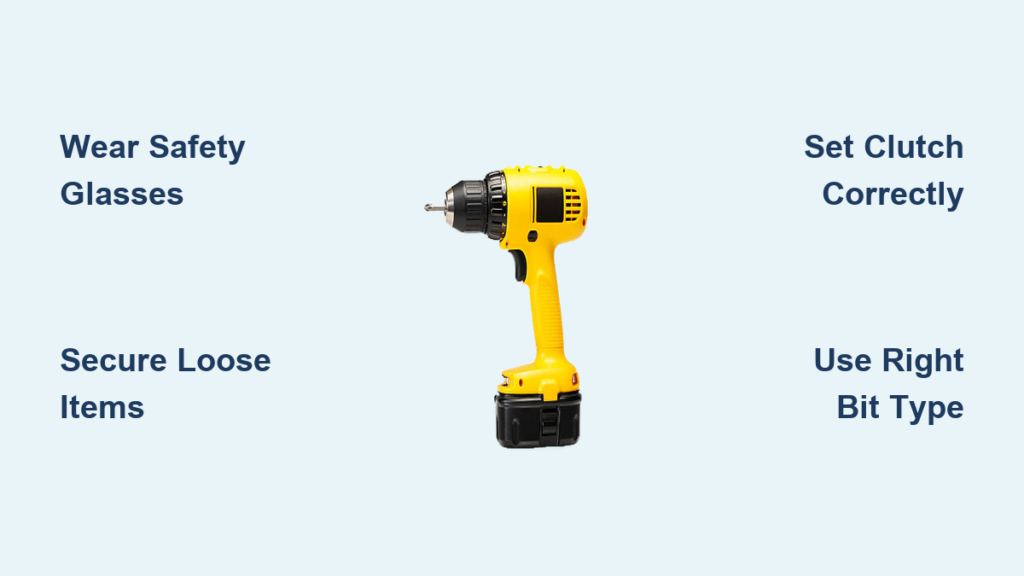
Why Safety Glasses Are Your First Line of Defense
Skipping eye protection risks permanent damage from flying debris—a single wood chip can travel at 100 mph when drilling. Always wear ANSI-approved safety glasses that seal tightly around your eyes, especially when drilling overhead or into brittle materials like tile. Polycarbonate lenses withstand impacts that would shatter regular glasses, and anti-fog coating prevents steam buildup during long sessions. Never rely on prescription glasses alone; clip-on safety shields create dangerous gaps where particles enter. If drilling creates metal shavings, add a face shield over your glasses for full coverage. This 10-second habit prevents the #1 cause of workshop eye injuries.
Securing Loose Clothing and Hair Properly
Entanglement with a spinning chuck causes severe lacerations or torn scalps in seconds. Roll sleeves above elbows before starting—never rely on rubber bands that slip. Remove rings, watches, and necklaces that could catch on protruding bits. Tie long hair in a low bun under a close-fitting cap, not a loose ponytail. When drilling near your body (like mounting cabinets), wear form-fitting shirts without drawstrings. Check for loose phone lanyards or tool straps that might dangle. If your drill jams, instinctive jerking motions can pull fabric into the mechanism—proper attire eliminates this silent hazard.
Decoding the Chuck: Keyless vs Keyed Models
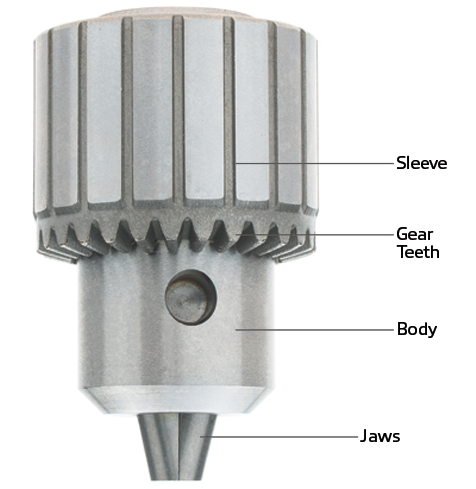
Your drill’s chuck is the rotating clamp holding bits securely. Keyless chucks (90% of modern drills) tighten with hand pressure alone—rotate the sleeve counterclockwise to open, insert the bit ¾ of its shaft length, then twist clockwise until snug. Test by gently tugging the bit; if it spins freely, tighten further. Keyed chucks require a small T-shaped key inserted into three side holes; turn the key clockwise while holding the chuck body until the bit won’t budge. Critical mistake: Leaving the chuck key in the drill during operation. This becomes a dangerous projectile—always store it in your drill’s battery slot after use.
Mastering the Clutch and Torque Settings
The numbered ring behind the chuck controls torque—the rotational force applied. Set it to 5–8 for softwoods like pine, 10–15 for hardwoods like oak, and the drill symbol (🔧) for all hole drilling. When driving #8 screws into plywood, start at setting 3; if the screw head strips, increase to 5. For pocket-hole joinery, use setting 1 to prevent over-driving. Pro tip: When the clutch “clicks” repeatedly, your setting is too low—gradually increase until screws seat flush without sinking below the surface. Never force screws when the clutch slips; this indicates pilot holes are too narrow or material is too dense.
Twist Bits: Your Go-To for Wood and Metal

Twist bits work for 80% of household tasks but require specific techniques. For clean wood holes, use a brad-point bit—the sharp center spur prevents wandering and the spurs score the wood grain to minimize splintering. When drilling metal, reduce speed to 300 RPM and apply light pressure with cutting oil (3-in-1 oil works in a pinch). Start with a center punch dimple to anchor the bit; without it, the tip will skate across smooth surfaces. Warning: Never drill metal with a dull bit—it overheats instantly, turning blue and losing temper. Keep spare bits in a compartmentalized case labeled by size (1/16″, 3/32″, etc.) for instant access.
Masonry Bits: Drilling Through Concrete Without Damage
Standard twist bits shatter when hitting concrete—they lack the tungsten carbide tip needed to pulverize masonry. Only use SDS or standard masonry bits with a hammer drill (not a regular drill). Set the mode selector to “hammer + drill”—the chisel action does 90% of the work. Start at 450 RPM with light, consistent pressure; excessive force jams the bit. Every 10 seconds, pull out to clear dust with a shop vac (never compressed air—it blows debris into your eyes). For holes over 1″, use a star drill technique: drill a ¼” pilot hole first, then gradually step up sizes.
Marking and Punching: Preventing Bit Wander
All drilling failures start with inaccurate placement. Use a carpenter’s square to mark perpendicular lines, not just a pencil dot. Then create a starter dimple: press a nail squarely into the mark and tap once with a hammer, or use a center punch for metal. This creates a microscopic crater that anchors the bit tip. Critical visual cue: If the bit skates during the first rotation, stop immediately—re-punch the mark. For curved surfaces like pipes, wrap masking tape around the area first, then mark through it; the tape provides grip for the bit tip.
Setting Up for Success: Clutch and Mode
Before touching material, configure your drill:
1. Select rotation direction: Forward (right) for drilling/driving, reverse (left) for screw removal
2. Adjust speed: Low gear (1) for driving screws, high gear (2) for drilling
3. Set clutch: Drill symbol for holes, number 4–6 for #6–#10 screws in softwood
4. Test on scrap: Verify settings create clean holes without splintering
Time-saver: For repetitive tasks (like cabinet installation), preset the clutch once then lock it with a rubber band around the ring. This prevents accidental changes between holes. If your drill has an LED light, angle it toward the work surface—it illuminates hidden grain patterns that cause bit drift.
Why a Hammer Drill Is Non-Negotiable for Masonry
Attempting concrete with a standard drill overheats the motor in minutes and dulls bits instantly. Hammer drills add a rapid pounding motion (up to 48,000 BPM) that fractures masonry without spinning force. Confirm yours has a dedicated hammer mode selector—don’t confuse it with “impact driver” settings (which only increase torque for screws). For brick walls, use 600 RPM with light pressure; for poured concrete, reduce to 400 RPM. Urgent warning: Never use hammer mode on wood or metal—it damages bits and creates dangerous kickback.
The Slow-and-Steady Technique for Masonry
Masonry drilling requires patience, not power. Start at 200 RPM with barely any pressure—let the hammer action do the work. After 5 seconds, withdraw the bit fully to clear dust (clogged bits overheat). Reinsert and repeat until the hole is ½” deep, then increase pressure slightly. For deep holes (>2″), use a vacuum hose taped to the bit to capture silica dust—a leading cause of lung disease. When breaking through the backside, reduce pressure to 10% to prevent blowout cracks.
Setting the Clutch for Perfect Screw Depth

Stripped screw heads waste more time than restarting the drill. Begin with the clutch at its lowest setting (1–2). Drive the screw until the clutch clicks; if it’s not flush, increase by one number and continue. For drywall screws, stop when the head is 1/16″ below the surface. Pro technique: When assembling furniture, drive screws until the clutch clicks twice—this ensures consistent depth across multiple joints. If using coarse-thread screws in hardwood, pre-drill a pilot hole 70% of the screw’s core diameter (not the threads) to prevent splitting.
Removing Stubborn Stripped Screws
When a screw head is damaged, standard bits slip uselessly. Instead:
1. Place a wide rubber band over the stripped head
2. Press a fresh Phillips #2 bit firmly through the rubber
3. Apply steady reverse pressure while gently tapping the chuck with a hammer
4. If stuck, use a left-handed drill bit to bore a small hole, then insert a screw extractor
Critical step: Always engage the drill’s reverse mode before attempting removal—forcing reverse in forward mode damages the transmission. For rusted outdoor screws, apply penetrating oil and wait 15 minutes before retrying.
Creating the Countersink Recess
Countersinking creates a conical recess so screw heads sit flush. After drilling the pilot hole:
1. Switch to a countersink bit matching your screw head angle (usually 82°)
2. Align the bit’s center spur with the pilot hole
3. Drill until the bit’s collar touches the wood surface
4. Adjust depth by loosening the collar ring for deeper recesses
Visual indicator: Stop when you hear a slight change in pitch—this means the cutting edges are fully engaged. For painted surfaces, countersink slightly deeper than needed; the paint will fill minor gaps. Always test on scrap wood first to calibrate depth.
Starting Slow: Why Patience Pays Off
Rushing the initial rotation causes 90% of bit wander. Place the tip in your starter dimple, then squeeze the trigger to 25% power for 2 seconds to establish the hole. Only then increase to full speed. For brittle materials like tile, maintain this slow start until the bit is 1/8″ deep. Time estimate: Allowing 3–5 seconds for hole initiation prevents 20+ minutes of patching splintered wood. If drilling through multiple layers (like cabinet doors), pause when the bit emerges to reposition the workpiece before continuing.
Preventing Wood Splitting and Material Damage
Hardwoods like maple split easily near edges. Always drill pilot holes 1/16″ wider than the screw’s core diameter when working within 1″ of board ends. For plywood, use brad-point bits and apply masking tape over the exit point to prevent tear-out. When drilling near pipes or wires, stop 1/2″ short and finish with a hand drill—you’ll feel resistance just before breakthrough. Pro tip: Place a scrap wood block under thin materials; this supports the backside and eliminates blowout.
Essential Maintenance for Long Drill Life
After every use, blow dust from the chuck vents with compressed air (never oil it). Store bits in a labeled case with silica gel packs to prevent rust. Every 10 hours of use, remove the chuck by running the drill in reverse while holding the chuck key—clean threads with a brass brush. Warning sign: If the drill emits burning smells, stop immediately; this indicates worn brushes or overheating bearings. For cordless models, store batteries at 40% charge in a cool, dry place—not attached to the drill.
Mastering how to use a power drill unlocks confidence for any project. Remember: sharp bits, correct torque settings, and slow starts prevent most failures. Revisit these techniques before your next task—especially the clutch settings for screw driving and the hammer mode requirement for masonry. With practice, you’ll develop the instinct to adjust pressure based on the drill’s sound and vibration. Now grab that drill, clamp your workpiece securely, and transform your DIY dreams into reality. For complex jobs like electrical box installations, always consult local codes—but with these fundamentals, you’re equipped for 95% of household projects.


