
Metal drilling demands precision, especially on vertical or overhead surfaces where handheld drills struggle. A magnetic drill press solves this by using electromagnetism to lock onto steel surfaces, creating clean, accurate holes without slippage. If you’ve ever battled wobbling drills or misaligned holes on structural steel, learning how to use a mag drill transforms frustrating jobs into efficient operations. This powerful tool combines the stability of a drill press with portability, making it indispensable for fabrication shops, construction sites, and maintenance teams. In the next few minutes, you’ll master every step—from magnet activation to slug removal—while avoiding critical safety pitfalls that could damage equipment or cause injury.
Why Magnetic Drills Outperform Handheld Drills for Metal
Handheld drills require significant physical effort to maintain perpendicular alignment on vertical beams, often resulting in oval holes or bit walking. Magnetic drills eliminate this by generating 2,000+ pounds of holding force through electromagnetic bases. When you activate how to use a mag drill properly, the machine becomes part of the workpiece, allowing both hands to control feed rate while the cutter removes metal chips in a controlled spiral. Unlike twist bits that create 70% of their heat at the tip, annular cutters used in mag drills shear material around the hole circumference, reducing heat buildup by 40% and extending cutter life. This efficiency becomes crucial when drilling multiple holes in I-beams or ship hulls where consistency impacts structural integrity.
Mandatory Safety Gear Checklist for Mag Drill Operators
Critical PPE You Must Wear Before Powering On
Skipping proper protection risks severe injury when metal chips fly at 10,000 RPM. Always wear:
– ANSI Z87.1-rated safety goggles with side shields (regular glasses won’t stop high-velocity shrapnel)
– Class 5 hearing protection (mag drills operate at 95+ decibels during heavy cutting)
– Cut-resistant gloves (level A5 minimum) to handle hot slugs and sharp edges
– Steel-toed boots and flame-resistant clothing to prevent molten metal burns
Pre-Use Inspection: 4 Non-Negotiable Checks
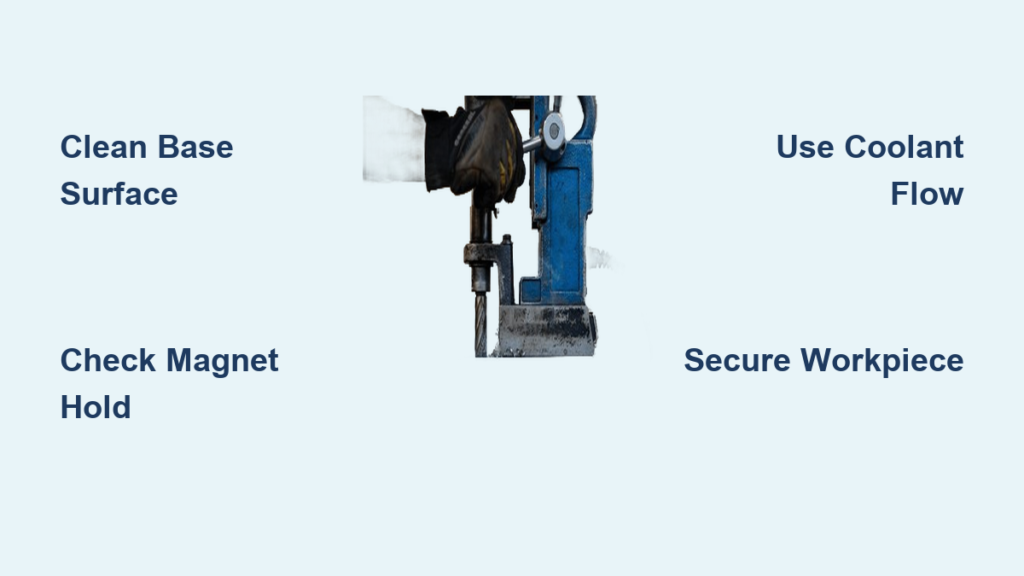
- Magnet surface verification: Run your palm across the base plate—any rust, paint chips, or oil residue reduces magnetic grip by 30%. Clean with 120-grit sandpaper if needed.
- Cord integrity test: Check for nicks within 6 inches of the plug where stress fractures occur. A single exposed wire can short-circuit the electromagnet mid-drill.
- Chuck retention check: Insert a hex key into the chuck and attempt to rotate it. If it slips, the collet needs replacement before use.
- Coolant flow confirmation: For HSS cutters, dry drilling above 120°C permanently damages the tool. Test coolant spray on scrap metal for even coverage.
Securing Your Workpiece: Beyond Magnet Reliance
Why Clamping Beats Magnetism Alone
The magnet secures the drill, not your workpiece. Unclamped steel can shift during breakthrough, causing violent kickback. Always anchor material with:
– Vice grips for small plates (minimum 2-inch jaw width)
– C-clamps rated for 5x the workpiece weight on beams
– Welding magnets for irregular shapes (never use rare-earth magnets near the drill base)
Ferrous Material Requirements
Magnetic drills only work on carbon steel or cast iron. Attempting to drill stainless steel (austenitic grades), aluminum, or wood creates catastrophic slippage. Verify material with a pocket magnet—if it sticks firmly, proceed. For painted surfaces, grind a 3-inch diameter “landing zone” where the drill base contacts metal.
Annular Cutter Selection and Installation Protocol
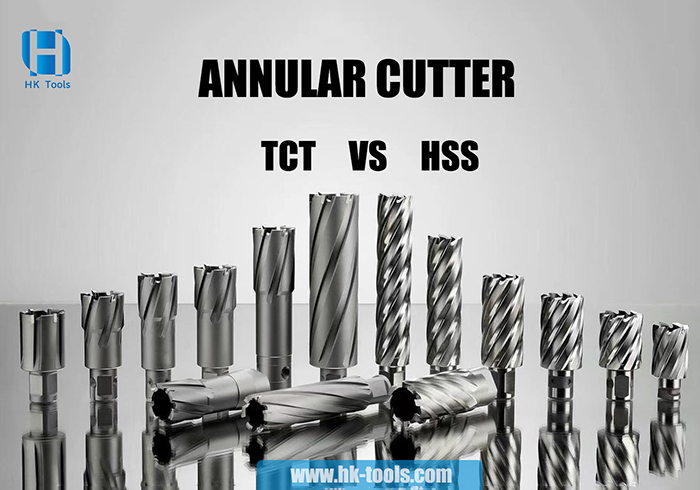
HSS vs. Carbide-Tipped Cutters: When to Use Which
| Cutter Type | Max Thickness | Speed Range | Best For |
|---|---|---|---|
| HSS Standard | 1.5 inches | 30-70 RPM | Mild steel, field repairs |
| Carbide Tipped | 4 inches | 15-40 RPM | Hardened steel, stainless |
| TCT Core Drill | 6+ inches | 10-25 RPM | Shipbuilding, structural |
Correct Installation Technique
- Wipe cutter shank and arbor with degreaser—oil causes slippage
- Align drive key with arbor slot (listen for audible click)
- Tighten set screw with 8mm hex key using two-stage torque:
– First turn: Hand-tighten until resistance increases
– Final turn: 1/4 turn with wrench (over-tightening cracks collets)
Magnet Activation and Depth Setup Process
Surface Preparation for Maximum Hold
Contaminants between base and workpiece are the #1 cause of magnet failure. Create a clean contact zone by:
– Grinding rust spots with angle grinder (use 36-grit flap disc)
– Wiping with acetone-dampened rag (never use WD-40)
– Checking flatness with feeler gauge—gaps over 0.005″ require surface grinding
Depth Stop Calibration
- Measure workpiece thickness with calipers
- Add 0.25″ to depth setting for slug clearance
- Lock stop collar with secondary set screw
- Critical test: Lower cutter to contact point without spinning—should stop exactly at surface
Drilling Execution: Feed Rate and Coolant Control

Alignment Verification Techniques
Before engaging the cutter:
– Place a precision level on the drill’s column (side and front)
– Adjust base leveling screws until bubble centers within 0.5°
– For overhead work, use laser alignment tool mounted to quill
Optimal Feed Pressure by Material
| Material | Feed Rate (in/rev) | Visual Cue |
|---|---|---|
| Mild Steel | 0.004-0.008 | Continuous silver chips |
| Hardened Steel | 0.002-0.004 | Short, blue-tinged chips |
| Cast Iron | 0.006-0.010 | Crumbly black chips |
Apply pressure through the feed handle—never body weight. If chips turn white (indicating overheating), retract immediately and increase coolant flow. For thick materials, use peck drilling: 0.5″ in, 0.25″ out to clear chips.
Slug Removal and Cutter Extraction
Safe Slug Ejection Procedure
As breakthrough nears (last 10% of depth), reduce feed rate by 50%. When the slug separates:
1. Stop motor but maintain magnet hold
2. Retract cutter 2 inches
3. Insert brass punch through center hole
4. Tap slug loose with 8oz ball-peen hammer
5. Never use fingers—slugs retain 200°F+ heat
Cutter Release Protocol
- Power off drill but keep magnet active
- Unscrew set screw 2 full turns
- Rotate cutter 90° to disengage drive key
- Lift straight up—side pressure damages arbor
Magnet Deactivation Safety Sequence
Preventing Accidental Drops
Magnet decay takes 3-5 seconds after power-off. Always:
1. Engage safety latch (if equipped)
2. Place palm flat on base plate
3. Flip power switch to OFF
4. Count “one-one-thousand” before lifting
5. Critical: Test hold by lifting only base handle—never the entire drill body
Emergency Response for Magnet Failure
If the drill shifts during operation:
– DO NOT release trigger—maintain motor speed
– Slowly retract cutter while keeping pressure
– Power off ONLY when fully retracted
– Investigate cause before restarting (90% of failures stem from surface contamination)
Daily Maintenance for 10,000+ Hour Lifespan
Post-Use Cleaning Routine
- Wipe base plate with oil-free cloth
- Blow chips from magnetic poles using air nozzle (max 30 PSI)
- Lubricate quill shaft with light machine oil
- Store cutter in foam-lined case—never loose in toolbox
Monthly Calibration Checks
- Test magnetic pull force with spring scale (should exceed 2,200 lbs)
- Verify depth stop accuracy with gauge blocks
- Inspect carbon brushes for 1/4″ wear limit
Troubleshooting Weak Magnetic Hold
Field Fixes for Common Issues
- Intermittent slipping: Clean commutator with electrical contact cleaner
- Humming without hold: Check for reversed polarity in power cord
- Reduced strength: Demagnetize base by tapping with copper mallet, then re-energize
Mastering how to use a mag drill separates amateur metalworkers from professionals. By following these precise steps—especially the magnet verification and controlled feed techniques—you’ll achieve perfect holes on the first attempt every time. Remember that 80% of mag drill failures stem from skipping pre-use inspections or rushing surface prep. Keep your cutter sharp, your base clean, and your safety gear on, and you’ll drill through steel like butter. For complex projects, always consult your specific model’s manual for torque specifications and cutter compatibility charts before starting. Now that you know the complete process, grab your safety glasses and make that first precise hole with confidence.


