
Your drill gun sits in the toolbox, ready to transform your DIY dreams into reality—but only if you know how to use it properly. Many beginners struggle with bits that wander across wood surfaces, screws that strip before seating properly, or even drill guns that suddenly stop working mid-project. Learning how to use a drill gun effectively separates frustrated hobbyists from confident DIYers who complete projects faster with professional results. This guide cuts through the confusion with specific, actionable techniques that solve common problems—like why your drill bit skates across smooth surfaces or how to prevent splintered wood when drilling through to the backside. You’ll discover exactly how to set your clutch for perfect screw depth every time, which drill bits actually work for different materials, and the safety mistakes 90% of beginners make with their drill guns.
Why Your Drill Gun Won’t Start Spinning (And How to Fix It Immediately)
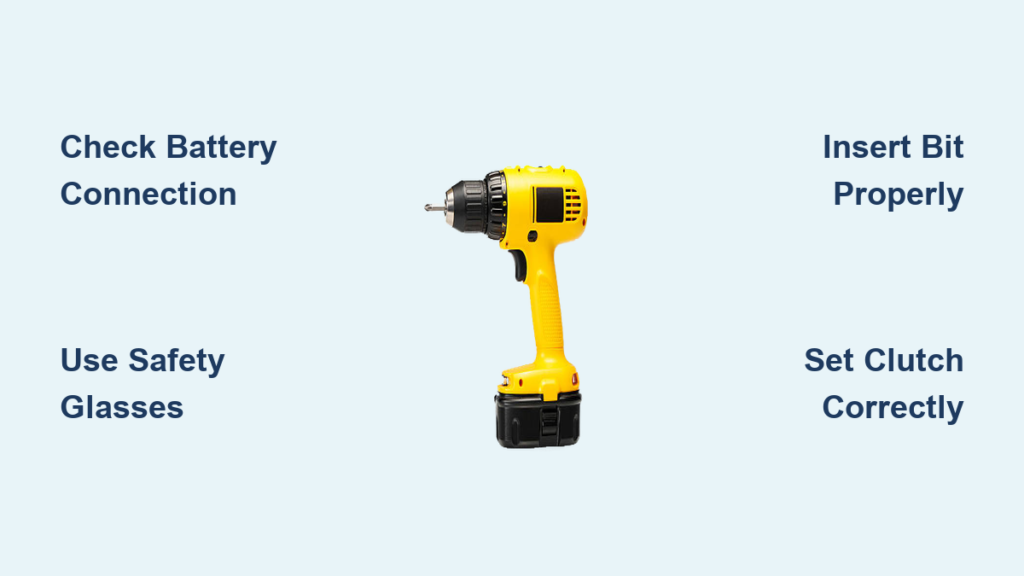
When you pull the trigger and nothing happens, your project grinds to a halt before it even begins. This frustrating scenario usually stems from three preventable issues that stop your drill gun from rotating. First, check your battery connection—loose contacts between battery and drill cause intermittent power failure. Remove the battery, clean the metal contacts with a dry cloth, then firmly reseat it until you hear the click. For corded models, verify the outlet works by plugging in another device.
Checking Battery Power and Connection Issues
A depleted battery is the most common reason your drill gun won’t spin, but don’t assume it’s dead just because the LED indicator shows low. Modern lithium-ion batteries have safety circuits that cut power when overheated. Let the battery rest for 15 minutes away from direct sunlight, then try again. If your drill gun still won’t start, test the battery in another compatible tool. Weak batteries often work for lighter tasks but fail under drilling pressure—replace batteries that can’t drive five 2-inch screws into pine without slowing down.
Troubleshooting Trigger and Switch Malfunctions
Your drill gun’s trigger contains delicate electrical components that wear out over time. If you hear a faint click but no motor response, the trigger mechanism likely needs cleaning. Unplug the drill or remove the battery, then spray electrical contact cleaner into the trigger housing while working the trigger back and forth. For drills with a forward/reverse switch that sticks in neutral position, apply a drop of light machine oil to the switch mechanism—never use WD-40 as it attracts dust that causes future sticking.
Essential Safety Steps Before Using Your Drill Gun for the First Time
Before you squeeze that trigger, implement these non-negotiable safety measures that prevent 95% of drill-related injuries. Your eyes face the greatest risk from flying wood chips, metal shavings, or concrete dust—regular sunglasses won’t protect you. Invest in ANSI Z87.1-rated safety glasses with side shields that seal against your face. Never operate your drill gun while wearing gloves, as spinning bits can catch loose fabric and pull your hand into the workpiece. Tie back long hair and remove dangling jewelry that could snag on moving parts.
What Eye Protection You Must Wear (Not Just Any Glasses)
Standard prescription glasses and fashion sunglasses lack the impact resistance needed for drill gun operation. Look for safety glasses marked “Z87+” which indicates they’ve passed high-mass impact testing. When drilling overhead, choose wraparound styles that prevent debris from entering from the sides. For extended projects, anti-fog lenses prevent your vision from clouding during sweaty work sessions. Keep a spare pair in your toolbox—safety glasses with minor scratches create visual distortions that cause drilling errors.
Why Gloves Are Dangerous When Operating a Drill Gun
Contrary to intuition, gloves increase your risk of serious injury with rotating tools. As the drill bit engages material, gloves can catch on the spinning chuck or bit, pulling your hand forward with tremendous force. This often results in “drill hand”—a painful abrasion where skin gets stripped from your palm. If you must wear gloves for material handling before drilling, remove them before powering on your drill gun. For cold workshops, use fingerless gloves that leave your trigger finger and palm exposed while keeping your hand warm.
How to Insert and Tighten Drill Bits Without Damaging Your Chuck
Forcing a drill bit into your chuck seems simple but causes two common problems: off-center rotation that creates oval holes and stripped chuck threads that prevent future bits from gripping properly. The correct technique takes just 15 seconds but ensures every hole starts precisely where you mark it. Always insert the bit shank fully into the chuck—partial insertion causes wobbling that damages both bit and chuck. Rotate the chuck sleeve counterclockwise until the jaws open wide enough to accept the bit without forcing it.
Hand-Tightening vs. Using a Chuck Key: Which Is Better?
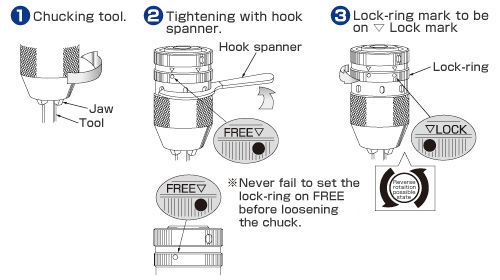
Most modern drill guns feature keyless chucks that tighten by hand, but many users don’t apply enough force. Grip the drill firmly with your non-dominant hand while using three fingers of your dominant hand to rotate the chuck sleeve clockwise as far as possible. Then, hold the chuck sleeve stationary with one hand while squeezing the trigger briefly with the other—this engages the drill’s torque to tighten the chuck fully. For older keyed chucks, insert each key into the three slots and turn clockwise with firm, even pressure. Never use pliers on the chuck sleeve—that damages the finish and makes future hand-tightening impossible.
The 3-Point Centering Technique for Perfect Bit Alignment
Misaligned bits cause wobbling that ruins hole quality and wears out your drill gun’s bearings. Before final tightening, visually check alignment from three angles: directly in front, then rotated 120 degrees twice. A properly centered bit will maintain the same gap between bit and chuck jaws when viewed from all sides. If the bit appears off-center from any angle, loosen slightly and reposition. For precision work like dowel holes, test the alignment by slowly rotating the chuck by hand—if you feel resistance or uneven movement, the bit isn’t seated correctly.
Why Your Drill Bit Walks Across Wood (And How to Stop It)
That frustrating moment when your drill bit skates across the wood surface instead of biting in wastes time and ruins your project layout. This happens because smooth wood offers no purchase for the bit’s cutting edge to grab. The solution isn’t more pressure—that just makes the bit wander farther—but creating a microscopic starter hole that guides the bit precisely. Without this critical step, even expensive drill bits behave unpredictably on finished surfaces.
Creating the Perfect Starter Dimple Without a Center Punch
You don’t need specialized tools to prevent bit walking—just a common household item. Place a small piece of painter’s tape over your drill mark, then pierce through it with a nail set or the tip of a sharp utility knife. The tape fibers grip the bit’s tip while the dimple provides initial purchase. For dark hardwoods where pencil marks disappear, use a fine-tip permanent marker to make your mark, then press the tip of your drill bit into the mark with finger pressure to create a tiny indentation before powering on.
The Tape Trick for Preventing Bit Slippage on Smooth Surfaces
When drilling into laminate, tile, or finished wood, standard dimpling methods fail because the surface resists penetration. Cut a 1-inch square of masking tape and place it over your mark. Press the tip of your drill bit through the tape with finger pressure to create a guide hole. The tape’s adhesive provides just enough resistance to keep the bit from skating while allowing clean penetration. Remove the tape immediately after drilling starts to prevent it from wrapping around the bit.
Drilling Through Wood Without Splintering the Backside
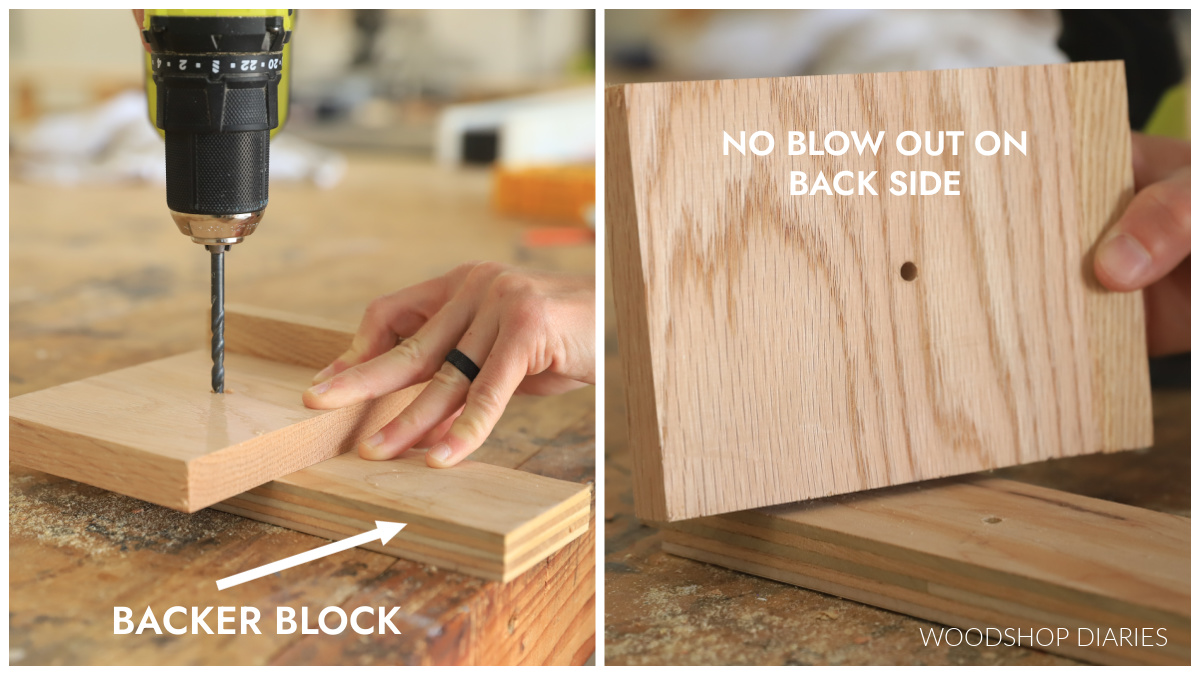
That perfect hole you drilled becomes ruined when the bit bursts through the backside, tearing out an unsightly chunk of wood. This “blow-out” happens because wood fibers separate prematurely as the bit exits. Professional woodworkers prevent this with a simple technique that takes 10 seconds to set up but saves hours of sanding and patching. The key is supporting the wood fibers at the exit point so they cut cleanly instead of splintering.
How to Set Up Your Sacrificial Backer Board in 30 Seconds
Place a scrap piece of softwood (like pine) underneath your workpiece, aligned so the drill bit will exit into it. Clamp both pieces together securely—any movement between layers causes tear-out. As the bit penetrates the backside of your project piece, it enters the sacrificial board which supports the wood fibers. Use a backer board at least 3/4-inch thick; thinner scraps won’t provide enough support. For expensive hardwoods, use a matching scrap piece as your backer board to minimize visible differences if minor tear-out occurs.
The Right Speed Settings for Pine, Oak, and Plywood
Material density determines optimal drilling speed—too fast burns wood, too slow causes rough holes. For softwoods like pine, use medium speed (1,000-1,500 RPM). Hardwoods like oak require slower speeds (750-1,000 RPM) to prevent burning. Plywood needs the slowest setting (500-750 RPM) because its layers separate easily at high speeds. Watch for smoke—that means you’re going too fast. If the bit struggles to advance, increase speed slightly. Always start slow, then gradually increase as the hole establishes.
Driving Screws Without Stripping Heads: Clutch Settings Explained

Stripped screw heads waste time, damage materials, and create weak joints that fail prematurely. This common frustration stems from incorrect clutch settings—most beginners set it too high, driving screws until the head mangles. The clutch’s numbered settings control torque, not speed, and each material requires different calibration. Learning to set your clutch properly transforms screw driving from a guessing game into a precise operation where every screw seats perfectly flush.
Finding Your Perfect Clutch Setting in 3 Test Drives
Start with setting 5 for most woodworking. Drive a screw into scrap material of the same type you’re using. If the screw stops before flush, increase one setting. If the head strips or the clutch doesn’t slip when the screw is flush, decrease one setting. For drywall screws into studs, you’ll likely need setting 8-10. For delicate trim work, settings 2-4 prevent sinking too deep. Always test on scrap first—wood density varies even within the same board.
Why #2 Phillips Fails on Deck Screws (And What to Use Instead)
Standard Phillips bits cam out (slip) under pressure on modern deck screws, which have higher torque requirements. Switch to square drive (Robertson) or star (Torx) bits that maintain contact under high torque. For #8 deck screws, use a T25 Torx bit; for #10, use T30. These bits last longer and prevent stripping because their star-shaped design transfers force more evenly. Keep a dedicated set of Torx bits for deck projects—using worn bits is the second most common cause of stripped screw heads.
5 Costly Mistakes That Damage Drill Guns (Number 3 Will Shock You)
Your drill gun represents a significant investment that can last decades with proper care, but these five preventable errors silently degrade performance and shorten its lifespan. Most users unknowingly commit mistake number 3 daily, causing irreversible damage to their drill’s internal components. Learning these pitfalls now saves you replacement costs and frustration later.
Why Forcing the Drill Breaks More Than Just Bits
Pushing hard against a struggling drill gun seems logical but actually reduces cutting efficiency and damages the motor. Drill bits cut most effectively with moderate pressure—excessive force dulls the cutting edges and generates heat that warps the bit. Worse, it strains the drill’s transmission, causing premature wear on gears. If your bit isn’t advancing, stop and check: you likely need a sharper bit, lower speed setting, or pilot hole for larger bits. Let the drill’s rotation do the work; your role is guiding, not forcing.
The Battery Storage Mistake That Kills Power in Months
Storing lithium-ion batteries fully charged or fully depleted destroys their capacity within months. The optimal storage charge level is 40-60%—enough to prevent deep discharge damage but not so full that chemical stress degrades the cells. If you won’t use your drill gun for over a month, charge the battery to half capacity before storage. Every three months, run it down and recharge to maintain cell balance. Never store batteries in extreme temperatures; garages and cars expose them to damaging heat cycles that permanently reduce capacity.
By mastering these essential techniques, you’ll transform from a frustrated beginner to a confident DIYer who completes projects faster with professional results. Remember to always remove your battery before changing bits, test clutch settings on scrap material first, and use the sacrificial backer board technique for clean exits. The next time you reach for your drill gun, you’ll approach each hole and screw with precision rather than guesswork. For your first real project, try building a simple floating shelf—this practical application combines accurate drilling, proper screw driving, and clutch calibration while creating something useful for your home. With these skills mastered, you’re ready to tackle more complex projects knowing your drill gun will perform reliably every time.


