
You squeeze the trigger on your Black+Decker drill, expecting the satisfying whir of spinning metal, but silence greets you. Or worse—you hear the motor straining while the chuck stubbornly refuses to budge. A Black+Decker drill not spinning isn’t just frustrating; it halts projects dead in their tracks. Before you write off your trusty tool or pay for expensive repairs, know this: 80% of “dead drill” cases stem from simple, fixable issues. With basic tools and systematic troubleshooting, you can often revive your drill in under 30 minutes—saving money and getting back to work faster.
This guide cuts through the guesswork with a proven diagnostic path. We’ll focus exclusively on hands-on fixes for common failure points: power delivery, chuck mechanics, gear systems, and motor components. No fluff, no vague theory—just actionable steps verified across Black+Decker’s corded and cordless models. By the end, you’ll know exactly why your drill won’t spin and how to fix it yourself.
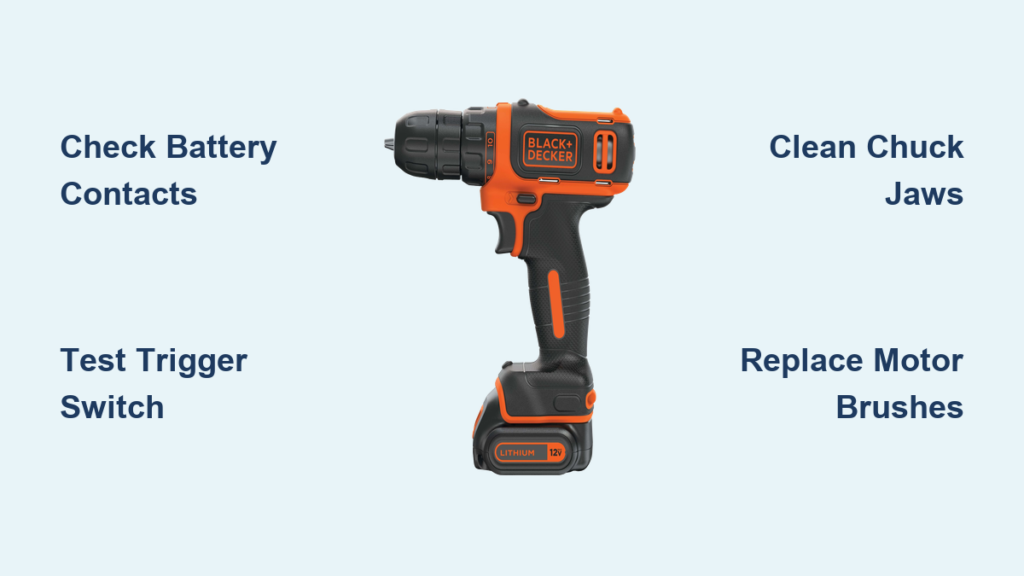
Diagnose Dead Power: Why Your Black+Decker Drill Won’t Spin
If your drill shows zero response when you pull the trigger, power failure is the prime suspect. Don’t jump to conclusions—90% of these cases involve easily solvable issues. Start here before dismantling your tool.
Confirm Battery and Cord Health in 60 Seconds
For cordless models: Remove the battery and inspect the metal contacts. Corrosion (white/green crust) or debris blocks power flow. Clean contacts with a pencil eraser and isopropyl alcohol. Test with a known-good battery from another Black+Decker tool—if it spins, your original battery is dead. For corded drills: Plug a lamp into the same outlet to verify power. Then flex the power cord near the plug while slowly pulling the trigger; if the drill sputters to life, internal wire damage requires cord replacement.
Test Trigger Switch Functionality
Hold the drill near your ear and pull the trigger slowly. No sound? Disconnect power and remove the battery/cord. Use a multimeter set to continuity mode: Touch one probe to the battery terminal contact inside the drill, the other to the motor wire terminal. Pull the trigger—if the meter doesn’t beep, the trigger switch is faulty. Pro tip: Tap the trigger housing firmly with a screwdriver handle while pulling the trigger. Intermittent operation confirms a failing switch needing replacement.
Spot Hidden Damage: What Sounds and Smells Reveal

Your senses detect problems multimeters miss. A burning odor or grinding noise provides critical clues about internal failures. Listen and sniff before disassembly—this avoids unnecessary teardowns.
Decoding Auditory Clues in Non-Spinning Drills
- High-pitched whine with no spin: Indicates stripped planetary gears. The motor spins freely but can’t transfer torque.
- Loud grinding during attempted spin: Signals metal-on-metal contact from broken gear teeth or a cracked gear housing.
- Single loud “clunk” when triggering: Suggests a sheared drive pin or severely stripped clutch mechanism.
Visual Inspection Checklist for Critical Failures
- Chuck rotation test: Manually twist the chuck clockwise and counterclockwise. Smooth rotation in both directions rules out mechanical jams. Stiffness in one direction points to gear damage.
- Ventilation port examination: Shine a flashlight into motor vents. Visible blue sparks or black carbon dust means worn motor brushes.
- Chuck key resistance check: Insert the key and turn. If it spins freely without gripping, the chuck’s internal threads are stripped.
Fix a Jammed Chuck: 4 Steps to Restore Spin
A seized chuck causes 30% of “drill not spinning” cases. Debris, overtightening, or corrosion locks the mechanism. Fix this without opening the drill housing.
Step 1: Deep-Clean Chuck Jaws
Remove the drill bit and spray penetrating oil (like PB Blaster) into the chuck’s jaws. Let it soak for 15 minutes. Insert a stiff brush (old toothbrush works) and scrub between the jaws to dislodge sawdust or rust. Wipe clean with a microfiber cloth.
Step 2: Break Free Internal Corrosion
Place the drill on a non-slip surface with the chuck facing up. Insert the chuck key and turn counterclockwise with firm, steady pressure—not jerking motions. If stuck, wrap the chuck key with a rubber mallet handle for extra leverage. Once loose, rotate the chuck fully open and closed 10 times to work the oil into threads.
Step 3: Verify Bit Compatibility
Using a bent or oversized bit can prevent proper chuck engagement. Try a new 1/4″ hex driver bit—if it spins freely, your original bit was the culprit. Never exceed the chuck’s max capacity (marked on the chuck collar).
Pro Tip: Apply a tiny drop of machine oil to chuck threads monthly. Avoid WD-40 for long-term lubrication—it attracts dust.
Repair Stripped Gears: How to Replace Damaged Internal Components
When the motor runs but the chuck won’t spin, stripped gears are the likely villain. This fix requires opening the gearbox but takes under 20 minutes with basic tools.
Gearbox Disassembly in 5 Key Steps
- Remove housing screws: Use a Torx T15 driver to extract all visible screws (check under labels for hidden ones).
- Separate the housing: Gently twist the two halves apart—don’t force it. Note gear alignment before removal.
- Inspect planetary gears: Look for chipped teeth on the sun gear (center) or planet gears (orbiting).
- Replace damaged gears: Match new parts to your model number (e.g., Black+Decker BDCDD12 uses part #90580300).
- Reassemble with grease: Apply lithium grease to new gears before housing reassembly.
Critical Warning Signs to Stop Work
If you see melted plastic near gears, stop immediately. This indicates thermal damage from overload—requiring full motor replacement. Never operate a drill with stripped gears; metal shards will destroy bearings.
Replace Worn Motor Brushes: A Brushed Motor Fix

For drills with faint humming but no spin (common in older Black+Decker models), carbon brush failure is the silent killer. Brushes transfer power to the motor commutator and wear out after 50-100 hours of use.
Brush Replacement Without Motor Removal
- Locate the brush caps (two small covers near the motor housing).
- Unscrew caps with a Phillips head—brush springs will pop out.
- Pull out old brushes (note orientation: curved side faces commutator).
- Insert new brushes (part #90542500 fits most models), compress springs, and reseat caps.
- Test spin before full reassembly.
Expert Note: If new brushes spark excessively, the commutator needs resurfacing with 400-grit sandpaper.
When to Call a Professional: 3 Non-Negotiable Red Flags
Stop troubleshooting immediately if you observe:
– Acrid burning smell with visible smoke from vents (indicates fried circuit board)
– Cracked gearbox housing (structural damage compromises safety)
– Water exposure (corrosion will spread internally even after drying)
These require OEM parts and calibration. A reputable repair shop charges $40-$75—still cheaper than a $100+ new drill.
Prevent Future Failures: 4 Maintenance Habits for Your Black+Decker Drill
Avoid recurring “drill not spinning” issues with these field-tested habits:
- Monthly chuck cleaning: Blow compressed air through chuck jaws after dusty jobs—never use oil on chuck mechanisms.
- Battery discipline: Remove batteries after use; store at 40% charge in cool, dry places (not garages!).
- Torque management: Start drilling at low speed (position 1-5 on clutch ring), increasing only as needed.
- Impact drill caution: Never use hammer mode on standard drills—it shatters internal gears.
A properly maintained Black+Decker drill lasts 5-7 years. When your drill inevitably falters again, revisit this guide—most fixes take less time than your coffee break. Get back to building, not buying. Your project—and wallet—will thank you.


